
Table of Contents
- How to Store Emergency Supplies Safely: A Step-by-Step Framework
- Building Your Emergency Kit Checklist
- Emergency Food Storage Best Practices
- Long-Term Water Storage Solutions
- Organizing Emergency Preparedness Supplies by Category
- Choosing the Right Containers and Climate-Controlled Storage
- Storage Location Selection and Apartment-Friendly Options
- Creating a Maintenance Schedule and Pet-Specific Considerations
Last Updated: July 22, 2026
How to Store Emergency Supplies Safely: A Step-by-Step Framework
Learning how to store emergency supplies safely ensures they're organized, protected, and accessible when you need them. Most households approach emergency preparedness haphazardly, stuffing supplies into random closets where they get damaged, forgotten, or impossible to locate in a crisis. This guide walks you through the exact framework to transform scattered emergency items into a structured, maintainable system that works whether you live in a suburban home or a compact apartment.
Why Safe Storage Matters for Emergency Preparedness
Proper storage determines whether your emergency kit remains viable when you need it most. Supplies left exposed to heat, humidity, pests, or light degrade rapidly. A first aid kit in an uninsulated attic becomes useless by summer. Canned goods exposed to temperature swings lose nutritional value and develop rust. Water stored improperly grows algae and bacteria.
The difference between a kit that saves your family and one that fails comes down to environmental control. Temperature stability, moisture management, and pest prevention are requirements, not luxuries. Safe storage also extends the life of expensive items, maximizing your investment. A properly stored 25-year food supply actually lasts 25 years; the same supplies stored carelessly might be inedible in 5 years.
Building Your Emergency Kit Checklist
Start by defining what "emergency" means for your household. A 72-hour kit keeps you stable through a power outage or temporary evacuation. A two-week kit handles extended supply chain disruptions. Your kit's scope determines storage needs.
Every emergency kit needs these core categories: water, food, first aid, documents, tools, sanitation, and communication. The specific items depend on your family's needs, medical conditions, pets, and climate.
Essential Items Every Household Needs
Your core emergency kit should contain water, non-perishable food, a first aid kit, medications, important documents, a battery-powered or hand-crank radio, flashlights with extra batteries, a multi-tool, emergency blankets, and basic sanitation supplies. Add a power bank, hand-operated can opener, and basic tool kit.
Water is non-negotiable: one gallon per person per day, minimum. For a family of four, that's 28 gallons for a week. Store it in food-grade containers, never in milk jugs (which degrade). Rotate water annually or use stabilized water products designed for long-term storage.
Non-perishable food should require no cooking or minimal water. Canned goods, peanut butter, granola bars, nuts, dried fruit, and freeze-dried meals work well. Include comfort foods; a chocolate bar makes a crisis psychologically more manageable, especially for children.
Scaling Your Kit for Your Living Situation
An apartment dweller might maintain a 72-hour kit plus a two-week backup stored under beds and in closets. A house with a basement can expand to multi-month reserves. Consider your climate: cold climates need extra blankets and hand warmers; hot climates require cooling strategies and heat protection. Humid regions need moisture-control solutions.
Emergency Food Storage Best Practices
Non-perishable food forms the backbone of any emergency kit. The goal is shelf stability without refrigeration, freezing, or cooking. Modern emergency food ranges from canned meals to freeze-dried camping food to commercial long-term storage kits.
Selecting Non-Perishable Foods and Shelf Life Considerations
Canned goods typically last 3-5 years at room temperature, though many remain safe longer if stored properly. Dried goods, pasta, rice, beans, and oats last 5-10 years in airtight containers. Freeze-dried meals can last 25+ years. Foods stored in cool, dry, dark conditions last significantly longer than those exposed to temperature swings, light, or moisture.
Variety matters for morale. If your emergency food is all canned beans and rice, family members won't eat adequately during stress. Include foods people actually enjoy, plus comfort items like instant coffee, tea, and chocolate.
Rotation Schedules and Expiration Date Tracking
Establish a rotation system before supplies arrive. Use a permanent marker to write the purchase date on every item as it enters storage. Every six months, review what you have and note what's approaching expiration. Rotate older items to the front; newer purchases go to the back.
Integrate rotation into your regular grocery shopping. If you store canned tomato sauce, buy an extra can during normal shopping and add it to your emergency stash. Use the oldest can from storage in your regular cooking, replacing it with a fresh one.
Create a simple spreadsheet or notebook tracking what you have, quantities, and expiration dates. Review it quarterly. This takes 10 minutes and prevents discovering your emergency food supply expired years ago.
Long-Term Water Storage Solutions
Water is heavier and bulkier than food, making storage logistics more complex. One gallon weighs 8.3 pounds. A week's supply for a family of four (28 gallons) weighs over 230 pounds.
Capacity Planning and Container Selection
Calculate your household's water needs: one gallon per person per day, minimum. For a family of four planning a two-week reserve, that's 56 gallons. Determine how much space you can dedicate to water storage and work backward to find your realistic capacity.
Use food-grade containers designed for water storage. Five-gallon buckets with lids work well for stationary storage. Smaller bottles work for grab-and-go kits. Never reuse milk jugs or containers that held non-food products.
Store water in cool, dark locations. Heavy containers need ground-level or low-shelf storage. Basements, garages, or ground-floor closets work better than upper floors.
Maintaining Water Quality Over Time
Tap water stored in food-grade containers lasts indefinitely if kept in cool, dark conditions away from chemicals and sunlight. Some people add food-grade water stabilizer (unscented bleach at 1/8 teaspoon per gallon) to extend shelf life, though this isn't necessary if conditions are ideal.
Rotate water annually or use commercially bottled water, which lasts longer. Test stored water occasionally by looking for cloudiness, discoloration, or odor. If anything seems off, replace it.
Organizing Emergency Preparedness Supplies by Category
Scattered supplies are useless supplies. In a crisis, you won't have time to hunt through boxes looking for bandages or batteries. Organization means everything is findable in seconds.
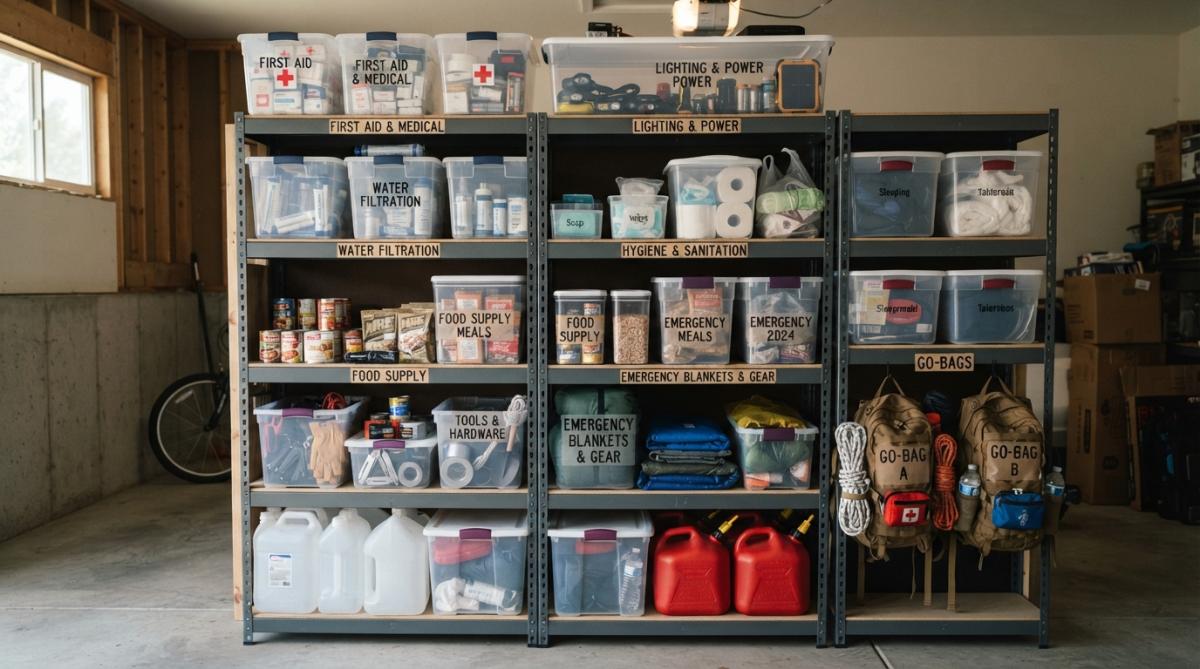
Divide your emergency kit into logical categories: water, food, first aid, medications, documents, tools, sanitation, lighting, communication, and warmth. Assign each category a dedicated container or zone. Use consistent labeling so anyone in your household can find what they need.
Designating Storage Zones in Your Home
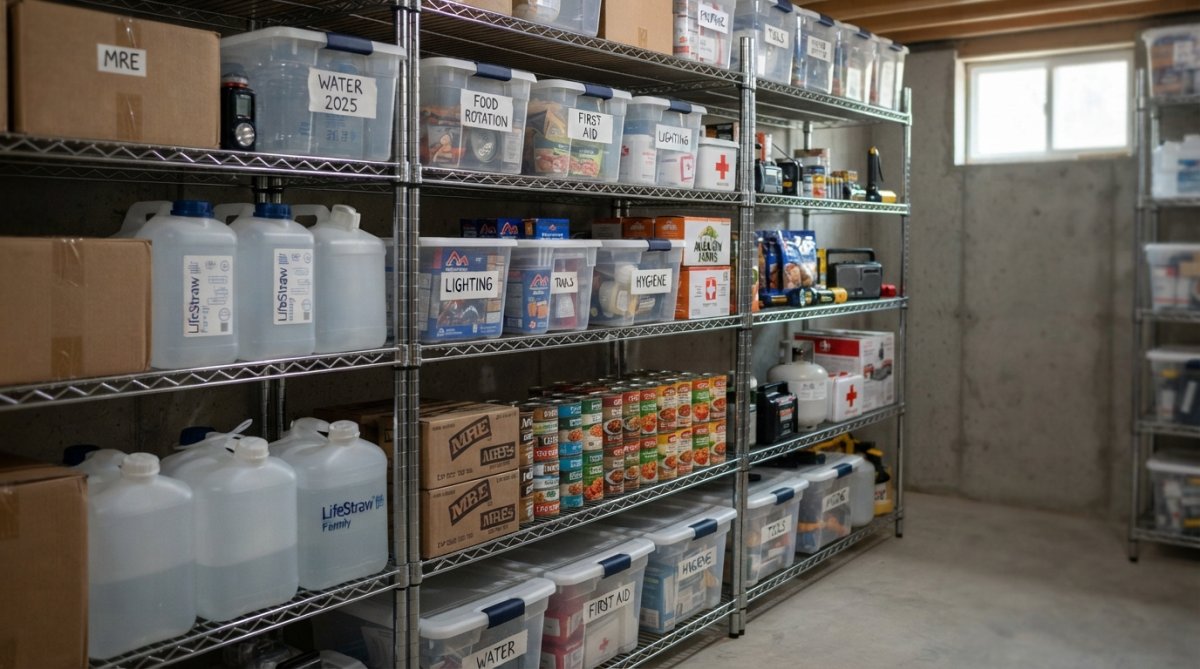
Choose a location that's cool, dry, dark, and accessible. A basement is ideal: stable temperature, minimal light, easy to organize on shelves. A climate-controlled garage works. A hall closet or under-bed storage works for smaller kits. Avoid hot attics, damp crawlspaces, or outdoor sheds.
Ensure your household knows where supplies are stored. A perfect kit hidden in a location only you know about won't help if you're injured and someone else needs to access it.
Labeling and Inventory Management Systems
Label every container clearly. Use a label maker or permanent marker to write category names on bins and shelves. Inside each container, list contents. This takes 30 minutes and saves hours during an actual emergency.
Maintain a simple inventory: a notebook listing what you have, quantities, and expiration dates. Update it annually. Consider taking photos of your storage setup for insurance purposes.
Choosing the Right Containers and Climate-Controlled Storage
Your containers determine whether supplies survive storage conditions intact. Wrong containers lead to moisture damage, pest intrusion, or degradation.
Airtight Containers and Plastic Bins for Cool, Dry Spaces
Food-grade plastic buckets with gamma-seal lids provide excellent protection for dry goods. Five-gallon buckets are standard for emergency food storage. Smaller containers work for first aid, medications, and documents. Use clear bins when possible so you can see contents without opening them.
For documents and medications, use waterproof containers. Add silica gel packets to absorb any moisture. Store important documents in a waterproof, fireproof safe if possible.
Climate-Controlled Solutions for Long-Term Preservation
If you're storing supplies for years, temperature stability matters enormously. Climate-controlled storage (consistent temperature, low humidity) extends shelf life dramatically. An uninsulated garage experiences 40-degree temperature swings seasonally; a climate-controlled basement stays around 65 degrees year-round.
If your storage space isn't climate-controlled, use insulation strategies. In hot climates, reflective emergency blankets wrapped around containers reduce heat absorption. In cold climates, insulation blankets protect against freezing. Consider a small dehumidifier in damp storage areas.
Storage Location Selection and Apartment-Friendly Options
Your ideal storage location balances accessibility, climate stability, and space efficiency.
Finding the Best Spot in Your Home
In a house, a basement is ideal. In an apartment, under-bed storage, closet shelves, and bathroom cabinets become your primary options. Ensure your storage location is accessible without moving other items. A kit buried under holiday decorations won't help in a crisis.
Consider security. Store valuable supplies somewhere family members can access but casual visitors can't. A locked closet or cabinet provides basic security.
Small Space and Apartment Storage Strategies
A 72-hour kit for a family of four fits in two large under-bed containers. A two-week supply requires more space but still fits in a typical apartment using closets, cabinets, and vertical storage. Use wall-mounted shelves in closets to double storage capacity. Over-door organizers hold first aid supplies, flashlights, and batteries.
Rotate supplies into regular use whenever possible. A family eating from their emergency supply every few months maintains freshness without waste.
Creating a Maintenance Schedule and Pet-Specific Considerations
An emergency kit requires regular maintenance to remain viable. Establish a simple schedule and stick to it.
Monthly and Seasonal Inspection Routines
Once monthly, do a quick visual inspection for signs of pest intrusion, moisture, or container damage. Quarterly, check expiration dates on medications and food, rotate items as needed, and replace batteries. Seasonally, do a comprehensive audit: open containers and inspect contents, test flashlights and battery-powered devices, and refresh water if using tap water storage.
Including Pet Supplies in Your Emergency Storage Plan
Pets need emergency supplies too. Store pet food (canned or dry with long shelf life), water, medications, bowls, leashes, carriers, and vaccination records. Calculate pet water needs; most pets need similar quantities to humans. Include pet first aid supplies and vaccination records in a waterproof container.
Practice moving your pet with emergency supplies. Can you carry your cat's carrier, a bag of supplies, and a water container simultaneously? Logistics matter.
| Maintenance Task | Frequency | Time Required | What to Check |
|---|---|---|---|
| Visual inspection | Monthly | 10 minutes | Pest damage, moisture, container integrity |
| Expiration review | Quarterly | 15 minutes | Food dates, medication dates, battery charge |
| Comprehensive audit | Seasonally | 60 minutes | All contents, water freshness, equipment function |
| Inventory update | Annually | 20 minutes | Quantities, additions, removals, location changes |
Emergency preparedness isn't about fear, it's about confidence. Knowing your family has reliable supplies stored safely and accessibly transforms how to store emergency supplies safely from an abstract concept into a concrete system you can trust. Start with a 72-hour kit, establish a maintenance routine, and expand gradually. Your future self will thank you for the work you do today.
Frequently Asked Questions
What are the best containers for storing emergency supplies safely?
Airtight containers and heavy-duty plastic bins are ideal for emergency supply storage. Choose containers that seal tightly to protect items from moisture and pests. Store them in a cool, dry location away from direct sunlight. Label each container clearly with contents and dates. For water storage, use food-grade containers specifically designed for long-term water storage. Avoid containers that previously held chemicals or non-food items.
How often should I rotate my emergency food storage and check expiration dates?
Check your emergency food storage at least twice yearly, spring and fall work well. Inspect all items for expiration dates, damage, or signs of pest activity. Rotate stock using the first-in, first-out method. Most non-perishable emergency rations have shelf lives ranging from 5 to 25 years depending on the product, but canned goods typically last 1-5 years. Create a rotation schedule and mark inspection dates on your containers to stay organized.
Where is the best place to store emergency supplies in a small apartment?
In apartments, use under-bed storage containers, closet shelves, or the back of cabinets for emergency supplies. Choose a cool, dry area away from heat sources and direct sunlight. Avoid damp basements or hot attics if possible. Consider vertical storage using wall-mounted shelves or stackable bins to maximize space. Keep grab-and-go items like flashlights and first aid kits in an easily accessible location. If space is extremely limited, prioritize the most essential items and scale your kit accordingly.
How much water should I store for long-term emergency preparedness?
The Federal Emergency Management Agency recommends storing at least one gallon of water per person per day for at least three days. For longer-term preparedness, consider two weeks of supply. Store water in food-grade containers in a cool location. Rotate water every six months to maintain freshness. Include additional water for sanitation and cooking. Label containers with the storage date. For families, calculate total needs based on household size and adjust based on climate, activity level, and any special medical needs.
This article was written using GrandRanker