
Table of Contents
- Why Humidity Damages Paper Records and Documents
- Finding the Best Humidity Level for Paper Storage
- Step 1: Monitor Humidity With a Hygrometer
- Step 2: Choose Archival Document Storage Supplies
- Step 3: How to Prevent Mold on Paper Documents
- Step 4: How to Dry Damp Paper Documents
- Common Mistakes to Avoid When Storing Paper Records
- Frequently Asked Questions
Last Updated: October 10, 2026
Why Humidity Damages Paper Records and Documents
High humidity destroys paper records by causing fibers to swell, glue to break down, and mold to grow.
Temperature swings worsen damage: repeated expansion and contraction causes brittleness and cracking.
Low humidity dries paper until it becomes brittle and crumbles, while insects thrive and cause irreparable damage.
The key is stability: paper needs consistent humidity levels year-round with no spikes or drops. This guide teaches you how to protect paper records humidity so your documents stay readable for decades.
Finding the Best Humidity Level for Paper Storage
The ideal humidity level for paper storage is 30-50% relative humidity (RH), which prevents mold and insect activity (Storing Your Books - Preserving Your Books).
For archival documents, aim for 30-40% RH to slow deterioration; historical records, legal documents, and family photos last longest at these levels.
For everyday records you access regularly, 40-50% RH provides flexibility while protecting documents.
Stay below 55% RH; above this threshold, mold grows rapidly and paper damage becomes permanent within weeks.
Keep temperature between 60°F and 70°F. Avoid basements that flood seasonally or attics that bake in summer heat. A climate-controlled closet, interior room, or dedicated storage cabinet works best. The goal is a place where temperature and humidity stay stable all year.
Step 1: Monitor Humidity With a Hygrometer
Buy a hygrometer to track humidity levels in your storage area.
A basic digital hygrometer ($15-$40) displays both temperature and humidity more accurately than analog models.
Place the hygrometer inside your storage area to measure actual document conditions. Check it weekly and record readings.
If humidity stays 30-50% RH, you're on track. If it climbs above 55% or drops below 25%, take action immediately.
Watch for seasonal patterns so you can plan ahead: install a dehumidifier before humid summers or a humidifier before dry winters.
Step 2: Choose Archival Document Storage Supplies
Containers matter as much as humidity control: standard cardboard boxes absorb moisture and transfer acids, failing within years.
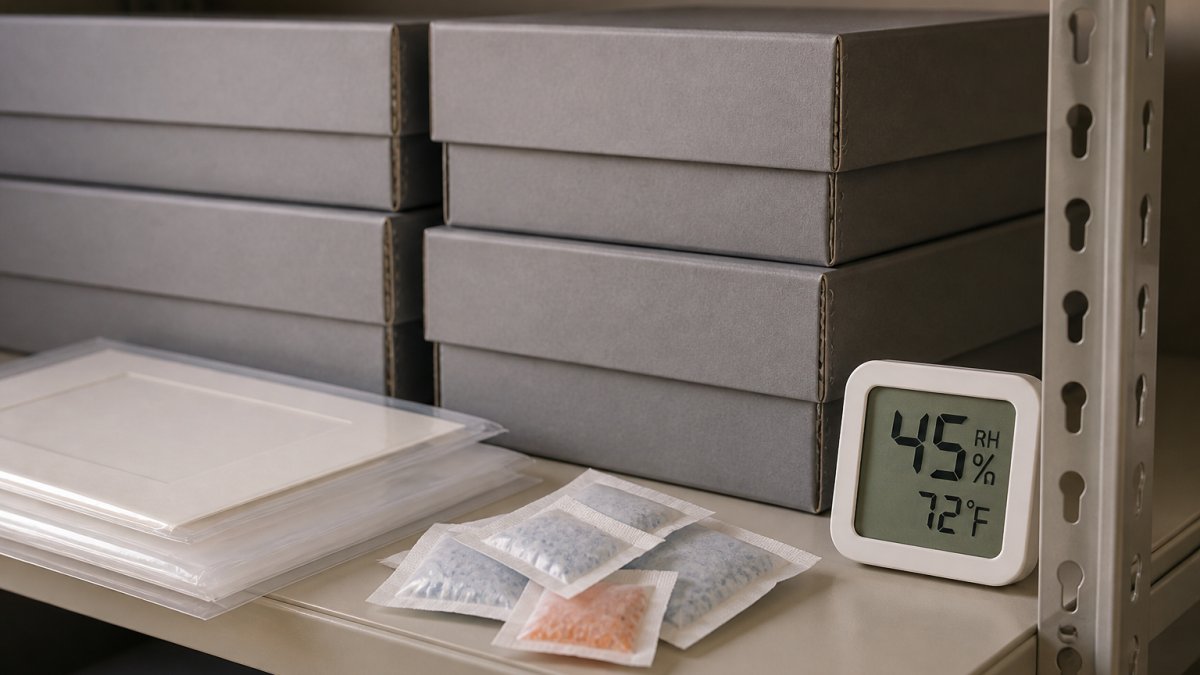
Use acid-free storage boxes (labeled "archival quality") to prevent fiber breakdown and protect documents for decades.
Store paper in acid-free protective sleeves to prevent direct contact with dust and moisture.
Storage Container Trade-Offs
Three main container types serve different needs:
Archival cardboard boxes are breathable and prevent condensation but offer no moisture barrier. Use in climate-controlled rooms at 30-50% RH.
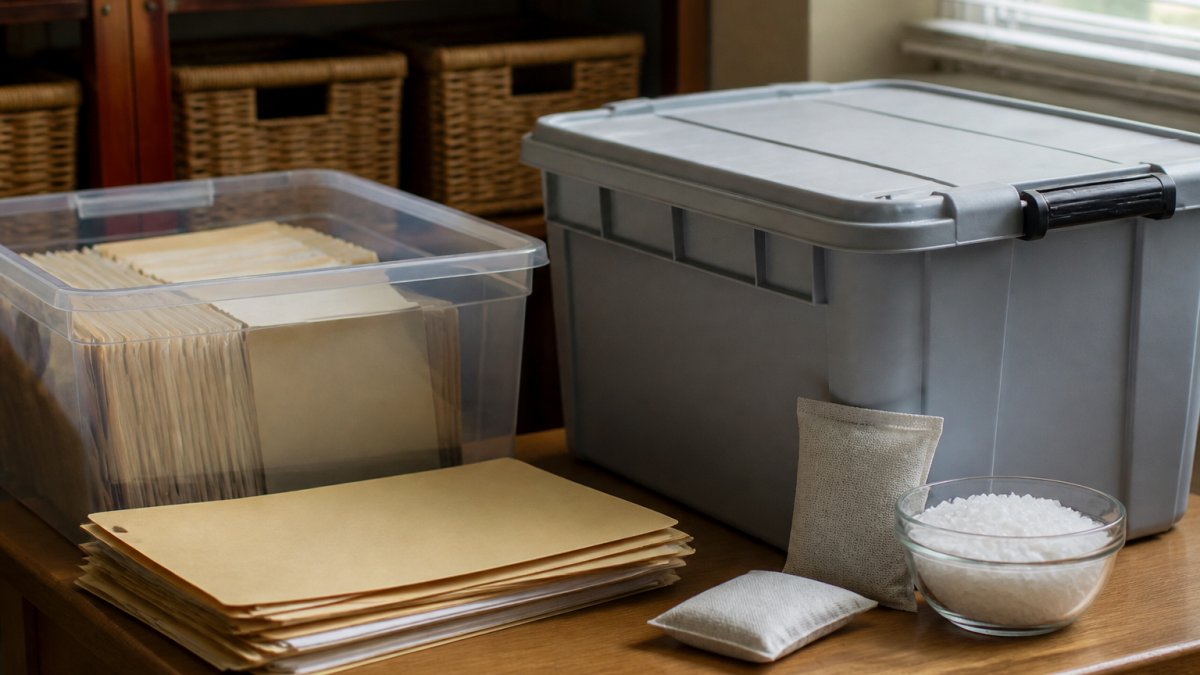
Plastic storage bins are moisture-tight but trap air inside. Never seal immediately after moving documents; leave unsealed 24-48 hours first to prevent condensation. Use only in stable, climate-controlled rooms.
Metal filing cabinets offer durability and moisture resistance without condensation risk. Ideal for high-value documents; ensure ventilation holes or leave doors slightly ajar.
Label every box with contents and storage date to track documents and humidity checks.
Sizing and Using Desiccants Correctly
Silica gel packets absorb excess moisture as a secondary layer in stable environments, not as a substitute for room humidity control.
Sizing: Use one 1-pound packet per 100 cubic feet (roughly one per standard archival box). For an 18" × 12" × 12" bin, use two packets. Undersizing causes saturation; oversizing wastes material but causes no harm.
Placement: Position packets on top of documents or shelves (not directly against paper) to allow air circulation. In plastic bins, place in corners where air pools.
Monitoring saturation: Check packets monthly; color-changing beads indicate saturation. Replace immediately when beads change color.
Replacement schedule: Replace every 6 months in stable rooms, every 3 months in basements or garages, and always after humid summers before sealing for winter.
Regeneration: Saturated silica gel can be dried and reused. Spread packets on a baking sheet and heat at 250°F for 2-3 hours in an oven until indicator beads return to their dry color.
Important limitation: Desiccants manage moisture inside a sealed or semi-sealed container. They cannot lower the humidity of an entire room. If your storage area stays above 55% RH, desiccants alone will fail.
Step 3: How to Prevent Mold on Paper Documents
Mold thrives above 55% relative humidity. Once it starts, it spreads fast and causes permanent damage. Prevention is far easier than cure.
Keep humidity below 50% RH at all times. Use a dehumidifier if your storage area tends to stay humid. Run it continuously during warm, humid months. Most dehumidifiers cost between $100 and $300.
Ensure air circulation in your storage space. Stagnant air creates pockets of high humidity. Open windows on dry days. Use a small fan to move air around boxes. Good airflow stops mold before it starts.
Check for leaks and water damage regularly. A small leak becomes a big problem fast. Inspect walls, ceilings, and floors monthly. If you find moisture, fix it immediately.
Never store paper on the floor or against exterior walls. The ground stays damp. Outside walls sweat in humid weather. Store boxes on shelves at least 6 inches above the floor and 12 inches away from outer walls.
Step 4: How to Dry Damp Paper Documents
If paper gets damp before you notice, act fast. The longer moisture sits, the worse the damage becomes. Your response depends on how wet the paper is and whether mold is visible.
Assessing Damage Before You Dry
Before moving documents, inspect them for mold. Mold appears as black, green, or white fuzzy spots, or as a musty smell. If mold is present, do not proceed with home drying. Seal the affected documents in a plastic bag and consult a professional conservator. Mold spores spread when disturbed, and home drying will contaminate your entire storage area.
For damp but mold-free paper, assess the moisture level:
- Slightly damp (pages feel cool or slightly wet to touch but no visible water pooling): Proceed with home drying.
- Wet (water dripping or pages visibly saturated): Separate pages immediately if possible without tearing. If pages are stuck together, do not force them, proceed with the stacked drying method below.
- Soaked (documents submerged or heavily waterlogged): This requires professional conservation. Improper drying causes permanent warping and ink bleeding. Contact a conservator.
Safe Drying Process
First, remove the damp documents from the humid environment. Place them in a dry room with good air circulation and low humidity, ideally 30-40% RH. If outside air is dry (humidity below 50%), open windows. If outside air is humid, keep windows closed and run a dehumidifier in the drying room.
Separate damp pages gently. Do not force them apart. If pages stick together, leave them alone and let them dry slowly. Forcing separation tears fibers and causes permanent damage.
For loose or separated pages:
Stand documents upright like books on a shelf. Lay them flat and they trap moisture between pages. Standing them up allows air to reach all surfaces.
Use a fan to speed drying. Point it across the documents, not directly at them. Direct air can warp paper and cause uneven drying. Indirect air circulation dries papers safely. Position the fan 3-4 feet away, angled to move air across the stack.
For bound documents or stacks:
If pages are stuck together or the document is bound, stand it upright with the spine down and pages fanned slightly open. Prop the pages open with acid-free paper or cardboard spacers every 20-30 pages to allow air penetration. This prevents pages from re-adhering as they dry.
For very thick books, place them spine-down on a shelf and gently fan the pages open by hand every few hours. Do not force pages apart.
Moisture Absorption During Drying
Place fresh silica gel packets nearby. They absorb moisture from the air as documents dry. Replace packets every 12 hours for the first 3 days, then every 24 hours until documents are completely dry. Check the color-change indicator on packets; replace when saturated.
Alternatively, place bowls of uncooked rice or fresh silica gel (not in packets) around the drying area. These absorb ambient moisture and speed the process. Replace rice daily.
Drying Timeline and Completion
This process takes time. Small documents (single sheets or pamphlets) dry in 2 to 5 days. Thick books or large stacks may take 1 to 2 weeks. Patience prevents further damage. Do not rush by using heat sources like hair dryers or radiators, these cause ink to run, paper to warp, and glue to fail.
Documents are completely dry when they feel cool to the touch and pages turn easily without sticking. A final hygrometer check confirms the drying room is back to 30-50% RH.
Preventing Re-Contamination
Once documents are completely dry, move them to proper archival storage with humidity control immediately. Do not return them to the damp location. If the original storage area is still humid or has shown water damage, identify and fix the source first:
- Check for leaks in walls, ceilings, or plumbing.
- Ensure the room has adequate ventilation and a dehumidifier if needed.
- Move storage boxes away from exterior walls and at least 6 inches above the floor.
- Run a hygrometer for one week to confirm humidity stays below 50% RH before returning documents.
Common Mistakes to Avoid When Storing Paper Records
Storing paper in basements. Basements flood. They stay damp year-round. Even "dry" basements have high humidity. Find another location.
Using plastic containers. Plastic traps moisture against paper. It speeds mold growth. Use acid-free cardboard or metal boxes instead.
Ignoring humidity spikes. Small humidity problems become big ones fast. Check your hygrometer weekly. Act the moment humidity climbs above 50%.
Packing boxes too tight. Air needs to circulate inside containers. Leave space between documents. Do not crush papers into a box.
Mixing different paper types. Old paper, new paper, photographs, and newsprint have different preservation needs. Store them separately in different humidity ranges.
Placing storage boxes against outside walls. Exterior walls sweat in humid weather. They leak in rain. Keep boxes at least 12 inches away from any outside wall.
Forgetting to replace silica gel. Silica packets absorb moisture until they are full. Once saturated, they stop working. Replace them every 6 months.
Storing paper in attics or garages. These spaces have extreme temperature swings. Paper expands and contracts. It becomes brittle and cracks. Use climate-controlled spaces only.
To protect paper records humidity effectively comes down to three actions: measure, control, and monitor. Buy a hygrometer and check it weekly. Keep your storage space between 30% and 50% relative humidity. Use archival-quality boxes and silica gel packets. Your records are worth protecting.
Frequently Asked Questions
What humidity level is safe for storing paper documents?
Paper records thrive in stable relative humidity between 30% and 50% RH, with 35% to 45% RH being ideal for long-term archival storage. Humidity below 30% RH causes paper to become brittle and glue to deteriorate, while levels above 55% RH promote mold growth and moisture damage. Maintaining stable conditions within this range protects paper records from contraction, brittleness, and biological threats like insects and mildew.
Can humidity cause mold on paper records?
Yes. Relative humidity above 55% RH creates an environment where mold spores germinate and spread across paper documents and archives. Mold thrives in warm, damp conditions and can cause permanent staining, deterioration, and health hazards. Preventing mold requires maintaining stable relative humidity below 55% RH, ensuring proper ventilation and air circulation, and using desiccants or a dehumidifier to control moisture in your storage environment.
What should I do if paper records become damp?
Act quickly to prevent mold. Move damp paper documents to a dry, well-ventilated area with low humidity and air circulation. Separate wet pages gently to prevent sticking, and allow them to air-dry slowly at room temperature, never use direct heat, which can cause warping. For heavily water-damaged archives, lay pages flat on absorbent material like blotting paper and change it as it absorbs moisture. Once dry, store the recovered documents in archival-quality containers with silica packets to maintain stable relative humidity.
Are plastic bins safe for storing important papers?
Standard plastic bins trap moisture and are not ideal for long-term paper storage. Instead, use acid-free cardboard boxes or archival storage cases that allow air circulation and won't off-gas harmful chemicals onto your documents. If you must use plastic, ensure it's airtight only after placing desiccants inside to control humidity. Line plastic containers with acid-free tissue, and monitor relative humidity regularly with a hygrometer to catch moisture buildup before it damages paper records.