
Table of Contents
- Prepping for Beginners: Why Start Now
- Step 1: Assess Your Risks and Build a Threat Analysis
- Step 2: Create a Beginner Prepping Checklist for Your Household
- Step 3: Food Storage for Beginners and Long-Term Supply Building
- Step 4: Water Purification Methods for Home and Emergency Storage
- Step 5: Build Your Bug Out Bag Essentials
- Step 6: Prepare Your Home for Shelter-in-Place and Power Outages
- Step 7: Build Psychological Resilience and Contingency Planning
Last Updated: August 1, 2026
Prepping for Beginners: Why Start Now
Emergency preparedness builds household resilience so your family stays safe during power outages, supply chain disruptions, or natural disasters. At SHTF Prepper Club, we help families approach emergency readiness methodically, without fear or unnecessary expense.
Most households have less than three days of food, water, and essential supplies on hand. A single weather event, job loss, or illness can destabilize a family in hours. This guide walks you through seven practical steps that build on each other, starting today. Each step is designed to be completed in weeks, not months, and delivers real peace of mind.
Step 1: Assess Your Risks and Build a Threat Analysis
Risk assessment is where every solid preparedness plan begins. You can't prepare for everything, so you prepare for what's most likely to affect your household and region.
Start by identifying the specific threats your area faces. If you live in a flood-prone zone, flooding is your primary concern. If you're in tornado country, a safe room and early warning systems matter most. The Federal Emergency Management Agency (FEMA) provides disaster planning resources and risk assessments for your specific location, which is the fastest way to understand what disasters are statistically likely in your area.
Identify natural disasters in your area
List the natural disasters that have occurred within 50 miles of your home in the past 20 years. Check local news archives, county emergency management websites, and FEMA's disaster declaration database. Rank your top three threats by likelihood.
Document your household vulnerabilities
Assess your household's specific vulnerabilities. Do you have elderly family members who need medications? Children with dietary restrictions? Pets that require special care? Do you rely on medical equipment that needs power? Write down each household member's needs: medications, dietary requirements, mobility limitations, emotional support needs. Prepping isn't one-size-to-all.
Step 2: Create a Beginner Prepping Checklist for Your Household
A beginner prepping checklist gives you a clear target instead of vague anxiety about "being prepared."
Priority items for the first 30 days
Start with these essentials:
- Water: 1 gallon per person per day for 14 days (food-grade containers)
- Non-perishable food: 2-week supply of shelf-stable items your family actually eats
- First aid kit with prescription medications and over-the-counter pain relievers
- Flashlights and extra batteries (at least 2 per person)
- Battery-powered or hand-crank radio
- Important documents in a waterproof container (insurance policies, medical records, property deeds)
- Cash in small bills
- Phone chargers (wall and car) plus portable battery bank
- Sanitation supplies: toilet paper, hand sanitizer, soap, feminine hygiene products, diapers if needed
- Prescription medications (30-day supply minimum)
- Pet food and supplies if applicable
This 30-day checklist is achievable within 2-4 weeks of shopping.
Scaling your checklist over time
Once you've completed the 30-day checklist, expand to 90 days, then 6 months.
| Phase | Timeline | Focus | Key Addition |
|---|---|---|---|
| Phase 1 | Weeks 1-4 | Basic survival (water, food, first aid) | 2-week emergency supplies |
| Phase 2 | Months 2-3 | Extended supplies and comfort | 90-day food rotation system |
| Phase 3 | Months 4-6 | Power independence and communication | Generator, backup power, radio |
| Phase 4 | Months 7-12 | Long-term resilience | 6-month food storage, water purification |
Rotate items into your regular consumption, replacing them as you go. This keeps supplies fresh and prevents waste.
Step 3: Food Storage for Beginners and Long-Term Supply Building
Food storage for beginners doesn't require special equipment or expensive dehydrated meals. Start by storing foods your family already eats and enjoys.
Shelf-stable foods that taste good to your family
The biggest mistake beginners make is buying emergency food they wouldn't normally eat. When a crisis hits, your family won't suddenly enjoy unfamiliar foods. Buy what you know works.
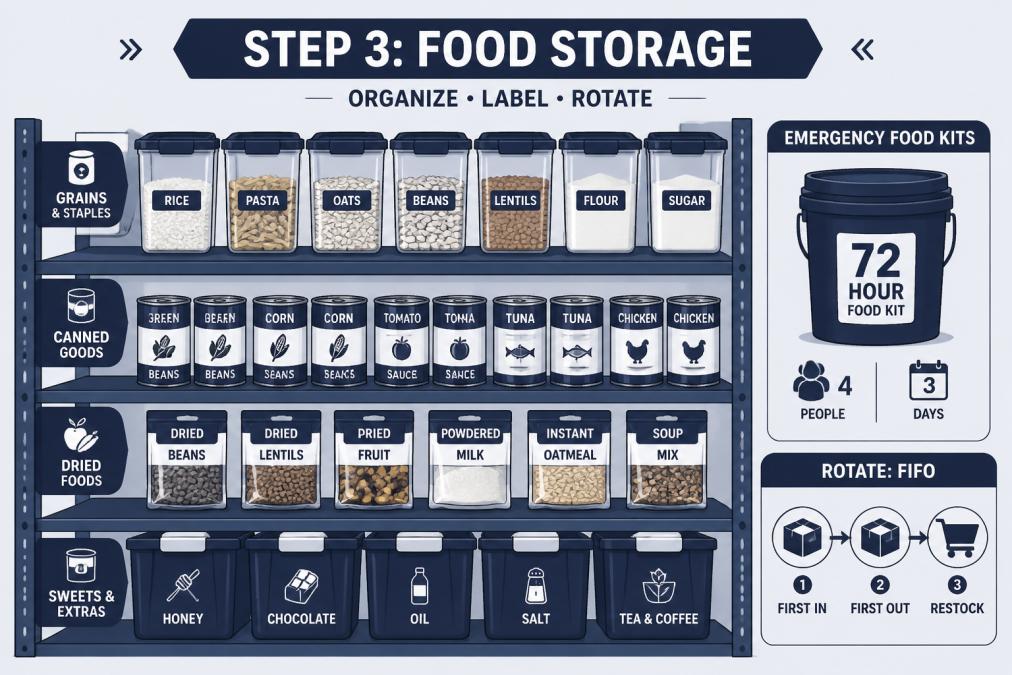
Focus on shelf-stable items with long natural shelf lives: canned vegetables, canned fruits, canned proteins (tuna, chicken, beans), pasta, rice, peanut butter, crackers, nuts, dried fruit, oatmeal, cereal, granola bars, and powdered milk. Include comfort foods like chocolate, coffee, and tea, because morale matters during emergencies.
Many households find that rotating shelf-stable pantry items is easier than maintaining a separate stockpile. Buy two of everything you normally use: one for the pantry, one for storage. As you consume from the pantry, you're naturally rotating your emergency supplies. For long-term food independence, consider freeze-dried meals or emergency food kits with 25-year shelf lives. SHTF Prepper Club offers vetted emergency food options with minimal preparation required.
Rotation and inventory management
Create a simple spreadsheet or notebook to track what you have, when you bought it, and when it expires. Use the FIFO method: First In, First Out. Consume older items first, replacing them with fresh stock. For canned goods, rotate every 12-18 months. For boxed goods like pasta and rice, rotate every 6-12 months. Label everything with purchase dates using a permanent marker.
Step 4: Water Purification Methods for Home and Emergency Storage
Water is non-negotiable. Your household needs drinking water, cooking water, and sanitation water.
Storage capacity and rotation schedules
Calculate your household's water needs: 1 gallon per person per day for drinking and cooking, plus additional water for sanitation. For a family of four planning a 2-week supply, store at least 56 gallons. For a 30-day supply, store 120 gallons.
Store water in food-grade containers like 5-gallon water cooler bottles, stackable water storage containers, or water barrels designed for long-term storage. Rotate stored water every 6-12 months, or use a rotation system where you consume stored water regularly and replace it. Tap water stored in sealed, dark containers in a cool location can remain safe for 6-12 months. For longer storage, add a small amount of unscented household bleach (about 1/8 teaspoon per gallon).
Filtration and purification options
Storage alone isn't enough. You need backup purification methods in case your water supply is contaminated or your stored water runs out. A quality water filter removes sediment, chlorine, and many bacteria. Gravity-fed filters (like LifeStraw or Big Berkey systems) work without electricity. Boiling water for 1 minute kills most pathogens but requires fuel and time. Water purification tablets (iodine or chlorine dioxide) are compact, lightweight, and reliable for emergency use.
Step 5: Build Your Bug Out Bag Essentials
A bug-out bag is a portable emergency kit you can grab in minutes if you need to evacuate.
Core items for evacuation readiness
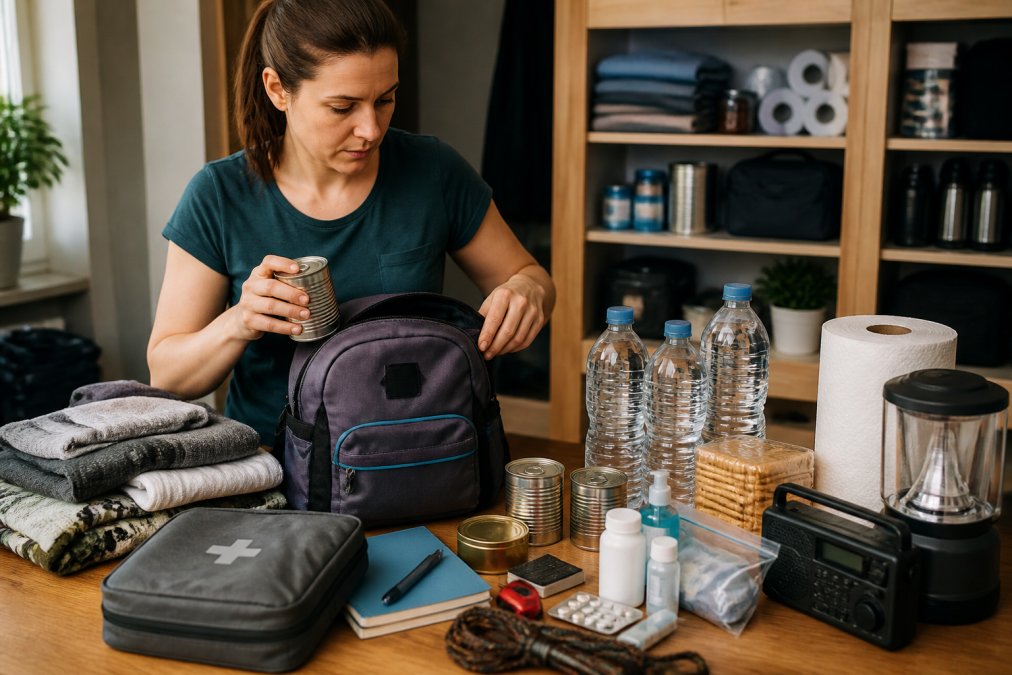
Your bug-out bag should contain:
- Water (1-2 liters minimum, plus purification tablets or lightweight filter)
- High-calorie food (energy bars, nuts, dried fruit)
- First aid kit (compact version)
- Flashlight with extra batteries
- Multi-tool or knife
- Important documents in a waterproof pouch (IDs, insurance papers, medical records)
- Cash in small bills
- Phone charger (portable battery bank)
- Change of clothes appropriate to your climate
- Sturdy shoes
- Medications (7-day supply minimum)
- Whistle (for signaling help)
- Duct tape (wrapped around a pencil to save space)
- Paracord or rope
- Hat and gloves (climate-dependent)
- Mask or respirator (for air quality emergencies)
- Emergency contact information written down
Keep your bug-out bag in an accessible location. Check it every 6 months to rotate batteries, update medications, and refresh food items.
Urban versus rural considerations
Urban evacuations differ from rural ones. In cities, you might shelter in place or move to a safer neighborhood on foot. In rural areas, you might need to travel longer distances or be isolated for days. Urban bug-out bags should emphasize compact size and public transportation access. Include public transit maps, cash for taxis, and a lightweight design you can carry for miles. Rural bug-out bags can be heavier and include navigation items (map, compass) and outdoor survival gear (fire-starting materials, emergency shelter).
Step 6: Prepare Your Home for Shelter-in-Place and Power Outages
Shelter-in-place means staying home during an emergency when evacuation isn't necessary or safe. This is the most common scenario for most households.
Emergency lighting and power solutions
When the grid goes down, lighting becomes essential for safety and morale. LED flashlights use less battery power and last longer than incandescent versions.
For extended power outages, a portable generator provides critical power for refrigeration, heating, and charging devices. Generators require fuel storage, proper ventilation (never run indoors, carbon monoxide is deadly), and regular maintenance. A smaller option is a portable power station (battery-powered backup power) that charges from solar panels or wall outlets. These are quieter, safer indoors, and require no fuel. Keep at least 2-3 light sources per room.
First aid, sanitation, and communication gear
A well-stocked first aid kit is essential. Beyond basic bandages and antiseptic, include pain relievers, antihistamines, anti-diarrheal medication, antacids, and any prescription medications your household needs. First aid knowledge matters more than supplies; consider taking a basic first aid course.
Sanitation during power outages becomes critical. Toilets won't flush without water pressure. Keep portable toilet seats, trash bags, and sanitation supplies. A five-gallon bucket with a toilet seat lid serves as an emergency toilet. Hand sanitizer, soap, and wet wipes maintain hygiene when water is limited.
A battery-powered or hand-crank radio keeps you informed about emergency broadcasts.
Step 7: Build Psychological Resilience and Contingency Planning
Emergency preparedness isn't only about supplies, it's about mental preparation. Families that communicate clearly and have practiced responding to emergencies handle actual crises far more effectively.
Family communication plans and meeting points
Establish a family communication plan before an emergency happens. Identify an out-of-area contact person (someone outside your region who family members can call to report their status). In major disasters, local phone networks often fail, but long-distance calls sometimes work. Everyone should know this contact's phone number.
Identify two meeting points: one near your home (in case you're separated and need to reunite) and one outside your neighborhood (in case your home is inaccessible). Create a household emergency contact card with phone numbers, addresses, and important information. Keep copies in wallets, backpacks, and emergency kits.
Mental preparation and stress management
Psychological preparedness means accepting that emergencies happen and you've taken reasonable steps to handle them. This alone reduces anxiety significantly. Practice your emergency plan with a family meeting where everyone discusses what they'd do in different scenarios. Run a mock power outage, light your flashlights, cook a meal on your camping stove, use your emergency toilet. This practice removes fear because you've actually done these things.
Stress management during emergencies relies on routine and normalcy. If you have children, maintaining regular meal times, sleep schedules, and familiar activities reduces their anxiety.
Frequently Asked Questions
What should a beginner prepper buy first?
Start with water storage (1 gallon per person per day for 2 weeks), shelf-stable food, a basic first aid kit, and a flashlight with batteries. Then build a bug out bag with documents, cash, and comfortable shoes. Next, establish a family communication plan and identify your local threats. This three-tier approach addresses immediate survival needs, evacuation readiness, and contingency planning without overwhelming your budget or storage space.
How do I create a beginner prepping checklist that fits my situation?
Begin by assessing your specific risks: natural disasters common in your area, power outage frequency, and household size. Write down what you need for 72 hours without utilities, then expand to 2 weeks. Prioritize water and food, then add first aid, lighting, sanitation, and communication gear. Break your checklist into 30-day phases so you're not buying everything at once. Review and adjust quarterly as your family's needs change.
What water purification methods for home are best for beginners?
Start with storing clean water (1 gallon per person daily) and rotate it every 6 months. Add a basic gravity filter or pitcher filter for backup purification. These require no electricity and work reliably. As you advance, consider larger capacity systems. Store purification tablets as a lightweight backup. Test any system before an emergency so you know it works when you need it. Label storage dates clearly and keep records of your rotation schedule.
How much space do emergency food and water kits actually require, and can I scale them for an apartment?
A 2-week water supply for a family of four takes roughly 56 gallons, which fits under a bed or in a closet corner. Emergency food kits are compact and stackable. Apartments work fine for prepping; prioritize vertical storage using shelves, closets, and under-sink space. Start smaller with a 72-hour kit, then expand as space allows. Many preppers use rolling storage bins that slide under furniture. The key is starting with what fits your home, then scaling gradually rather than abandoning prepping due to space concerns.
This article was written using GrandRanker