
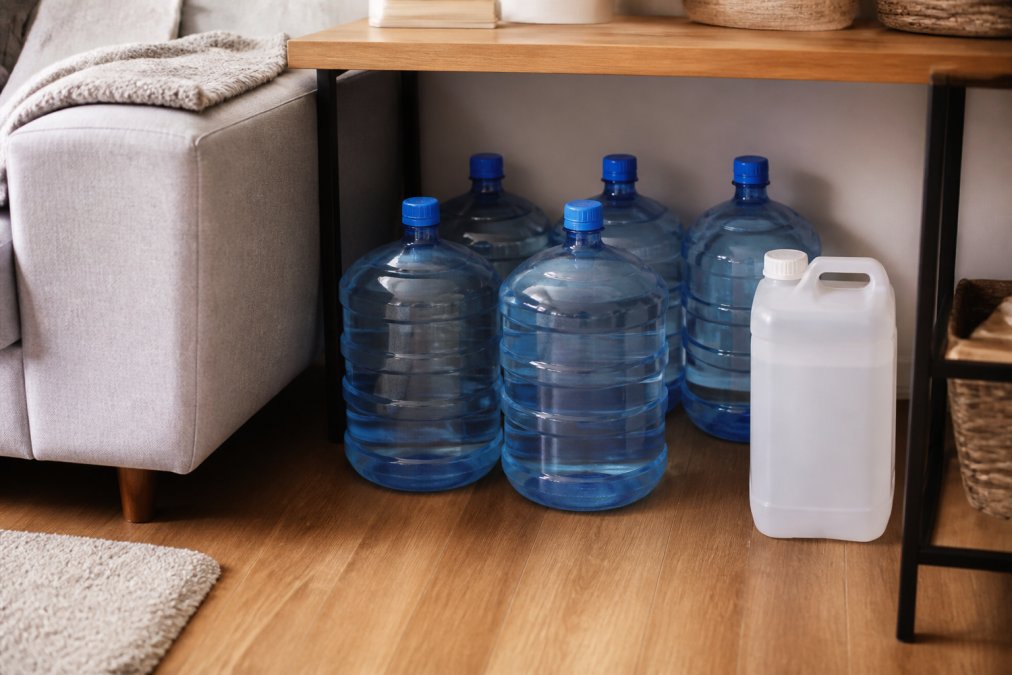
Table of Contents
- Why Water Storage Matters in Small Apartments
- FEMA Water Storage Guidelines for Your Household
- Choosing the Right Containers for Small Spaces
- Water Storage Shelf Life and Maintenance
- Ideal Storage Locations in Your Apartment
- How to Purify Stored Water for Safety
- Step-by-Step: Setting Up Your Apartment Water Supply
- Common Mistakes to Avoid
Last Updated: August 10, 2026
Why Water Storage Matters in Small Apartments
When disaster strikes, a hurricane, extended power outage, or water system failure, most people realize too late they have no backup supply. Small apartments present a unique challenge: you need adequate water for survival without sacrificing living space or structural integrity.
A single person needs one gallon per day for drinking and basic sanitation. A family of four requires four gallons daily. For a two-week emergency supply, that's 56 gallons for one person, 224 gallons for a family. With the right containers, smart placement, and a rotation system, you can maintain adequate emergency water supplies even in tight quarters.
This guide walks you through exactly how to do it, addressing weight limits, rental restrictions, and the need to keep your space functional.
FEMA Water Storage Guidelines for Your Household
The Federal Emergency Management Agency recommends one gallon per person per day for at least three days. Most emergency management professionals recommend extending this to two weeks for true security: 56 gallons per person, or 224 gallons for four people.
The challenge in apartments isn't understanding the guideline, it's implementing it safely. A two-week supply for a family of four weighs roughly 1,800 pounds. Standard apartment flooring is typically rated for 40 pounds per square foot as a live load. Concentrating 1,800 pounds in one spot risks ceiling damage in the unit below.
Smart distribution is critical. Rather than storing all water in one location, spread containers across multiple rooms, closets, under sinks, and bathrooms. This distributes weight and makes storage invisible to casual observation.
FEMA emergency preparedness guidelines recommend storing water in food-grade containers away from direct sunlight.
Choosing the Right Containers for Small Spaces
Not all water storage containers are created equal. The wrong choice leads to wasted space, contamination, or structural problems.
Food-Grade Plastic Containers and Jerry Cans
Food-grade plastic is the standard for potable water storage. These containers are manufactured specifically to hold drinking water without leaching chemicals. Look for containers labeled as food-grade or certified for potable water use. Avoid re-purposed milk jugs or containers that previously held non-food items, residual chemicals contaminate water over time.
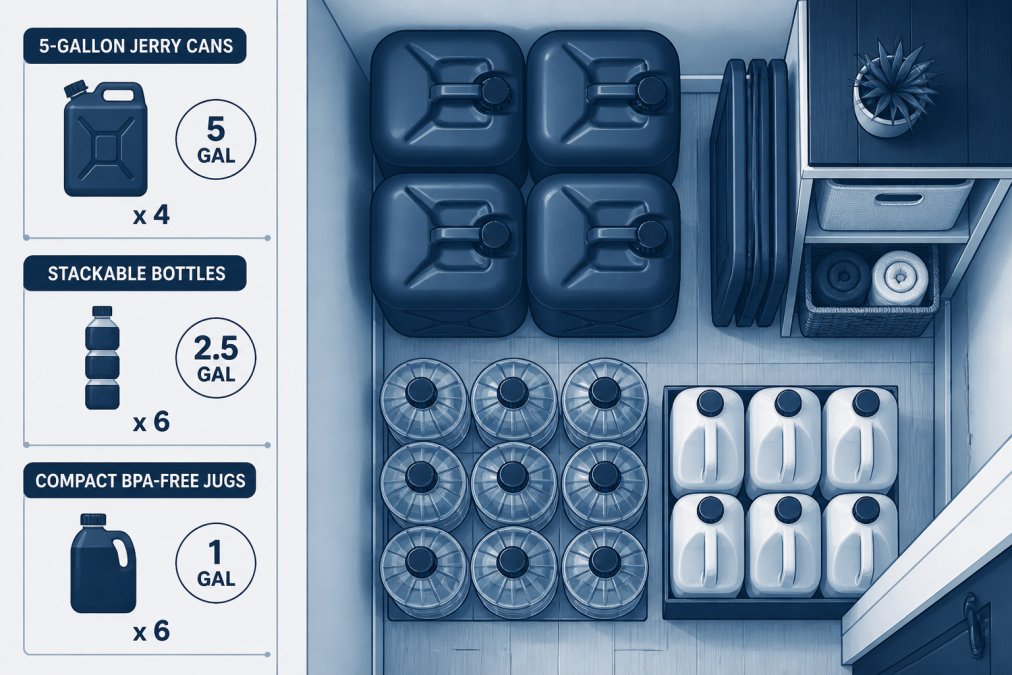
Jerry cans, the military-style metal or plastic containers, work well for apartment storage. They're durable, stackable, and come in sizes from 3 to 7 gallons. A 5-gallon jerry can is the practical sweet spot: large enough to store meaningful volume, small enough that one person can handle it safely (a full 5-gallon container weighs about 42 pounds). The critical specification is BPA-free plastic construction. Bisphenol A (BPA) is a chemical that can leach into water, especially in warm conditions.
Stackable and Space-Saving Options
Stackable containers are essential in apartments. A 5-gallon container has a footprint of roughly 12 inches by 12 inches. Stack four of them, and you've created a 4-foot-tall column occupying minimal floor space. WaterBricks and similar modular containers are engineered for stacking and can be stacked five or six high. Their rectangular shape (roughly 10 inches by 18 inches) fits into tight spaces, under beds, or in closets.
Flat-pack water containers save enormous space. They hold 5 gallons but compress to a few inches thick when empty. The downside: they're less durable than rigid containers and require careful handling.
Consider your available space first, then choose containers that fit. A bedroom closet might accommodate two stacks of four 5-gallon jerry cans (40 gallons). A bathroom corner could hold WaterBricks. Under a kitchen sink, flat-pack containers work well. Distribute volume across multiple locations.
Rental-Friendly Storage Solutions
Renters face an additional constraint: landlords. The solution is integration with existing furniture.
Furniture-integrated storage hides water in plain sight. A low bookshelf can sit atop water containers. Bed risers can elevate a bed frame, creating space underneath for flat-pack containers. A closet shelf system can support containers without permanent modifications. Decorative storage ottomans can hold water containers inside while functioning as normal furniture.
Weight distribution is especially important for renters. Spreading 200 gallons across multiple rooms means no single floor area bears excessive load. A bedroom closet might hold 40 gallons. A bathroom corner, 30 gallons. A kitchen pantry, 40 gallons. A living room closet, 40 gallons. Document your setup with photos to demonstrate to a landlord that your storage is safe and non-damaging.
Water Storage Shelf Life and Maintenance
Water itself doesn't expire, but stored water can become contaminated if not managed properly. Understanding shelf life and maintenance is the difference between safe drinking water and a hazard.
How Long Potable Water Stays Safe to Drink
Properly stored potable water remains safe for years. The EPA doesn't set an expiration date for properly stored drinking water, but most emergency management agencies recommend rotating water every six months to one year as a precaution.
In practice, water stored in sealed, food-grade containers in a cool dark place remains potable far longer than six months. The key variables are temperature, light exposure, and container integrity. Water stored in a cool dark closet remains safe longer than water stored in a warm garage or near a sunny window.
Water Rotation and Quality Checks
Rotation is the practical answer to long-term storage concerns. Every six months, use your stored water for watering plants, cleaning, or filling a pool. Replace it with fresh water. Label every container with the fill date using a permanent marker.
Quality checks are visual and olfactory. Before drinking stored water in an emergency, look for cloudiness, discoloration, or sediment. Smell it. Water that smells off, tastes metallic, or appears cloudy shouldn't be consumed without treatment. Clear, odorless water that's been stored properly is safe. If concerned about microbial contamination, boiling the water (rolling boil for one minute) kills most pathogens.
Ideal Storage Locations in Your Apartment
The best storage location balances three factors: weight distribution, climate control, and accessibility.
Cool Dark Places and Weight Considerations
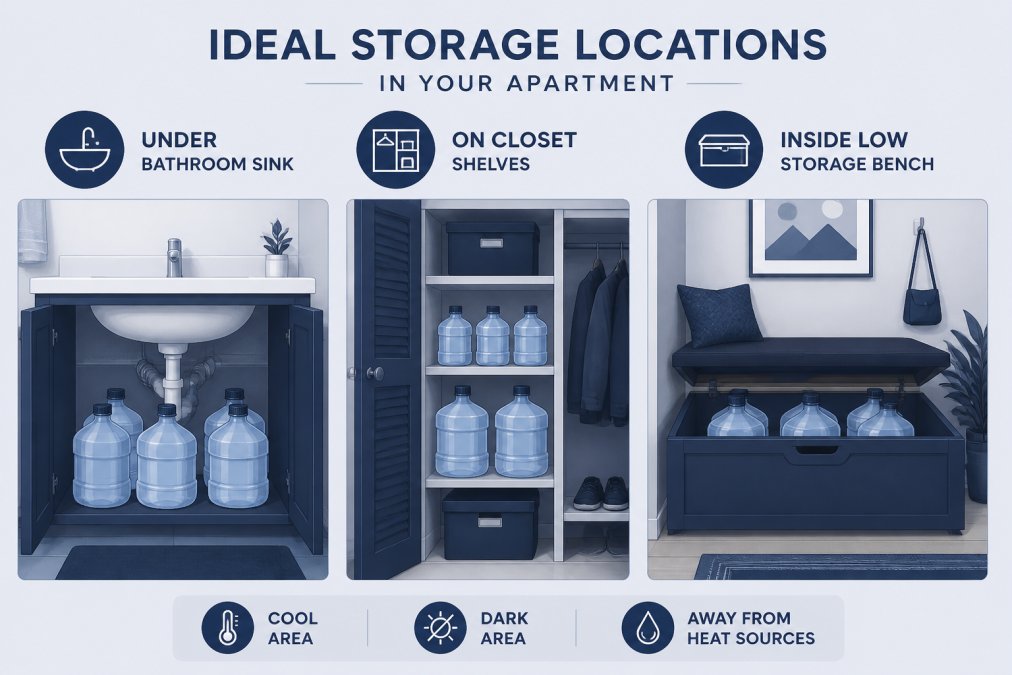
Water storage requires cool, dark conditions. Heat accelerates degradation and can cause container materials to break down. A cool dark closet is ideal. A basement (if your apartment has one) is perfect. Under a sink, away from pipes, works. A bathroom closet, away from heat sources, is viable.
Avoid areas near appliances that generate heat, above a refrigerator, next to a furnace, or in direct sunlight.
Weight distribution is the practical constraint most apartment dwellers overlook. Standard apartment flooring is typically rated for 40 pounds per square foot as a live load. A concentrated stack of water containers creates a point load, which can exceed that rating. Spread those same containers across a closet on multiple shelves, and the load is distributed. A closet 3 feet wide and 2 feet deep distributes 200 pounds across 6 square feet, or roughly 33 pounds per square foot, well within safe limits.
Hidden Storage Hacks for Tight Quarters
Creative placement makes large water supplies nearly invisible in small apartments.
Under-bed storage is the simplest hack. Bed risers elevate a bed frame 4-6 inches, creating space underneath. Flat-pack water containers slide under easily. A queen bed with risers can accommodate 60-80 gallons of water stored flat.
Closet shelving systems can be installed without permanent modifications. A walk-in closet might hold 100+ gallons distributed across multiple shelves. Bathroom vanities often have unused space. The area under a sink can hold flat-pack containers. Hallway closets are often underutilized. A coat closet can hold water containers behind or above coats.
Rather than storing 200 gallons in one location, store 40 gallons in five different locations. Each location uses existing space, and no single area bears excessive weight.
How to Purify Stored Water for Safety
Even properly stored water benefits from treatment before consumption. Purification ensures that any microorganisms or contaminants are eliminated.
Water Treatment and Filtration Methods
Boiling is the simplest and most reliable method. Bringing water to a rolling boil for one minute kills most pathogens, including bacteria, viruses, and protozoa. At high altitudes (above 6,500 feet), boil for three minutes.
Bleach treatment is effective and requires minimal equipment. Unscented household bleach (5-6% sodium hypochlorite) kills most microorganisms. Add two drops of bleach per quart of clear water, or eight drops per gallon. For cloudy water, use four drops per quart or 16 drops per gallon. Stir well and let sit for 30 minutes before drinking.
Water filtration removes particles and some contaminants but doesn't eliminate all microorganisms. A quality water filter with activated carbon and fine mesh can improve taste and remove sediment, but shouldn't be your only treatment method. Combine filtration with boiling or bleach for comprehensive purification.
SHTF Prepper Club recommends having multiple purification methods available. Boiling works if you have fuel and a heat source. Bleach works without power. Filters improve taste and remove particles. Together, they ensure your water supply is safe under various emergency scenarios.
Bleach Ratios and Chemical Treatment
The correct bleach ratio is critical. Too little bleach fails to kill pathogens; too much makes water undrinkable.
For unscented household bleach (5-6% sodium hypochlorite):
- Clear water: 2 drops per quart, or 8 drops per gallon
- Cloudy water: 4 drops per quart, or 16 drops per gallon
Measure carefully. After adding bleach, stir thoroughly and let the water sit for 30 minutes. A slight chlorine taste indicates adequate treatment. If you don't detect chlorine taste after 30 minutes, add another dose and wait another 15 minutes.
Store bleach in a cool dark place. Bleach degrades over time, especially when exposed to heat or light. Replace bleach every six months for long-term storage.
Step-by-Step: Setting Up Your Apartment Water Supply
A functional water storage system requires planning and execution. This five-step process walks you through building a system that works for your household and space.
Step 1: Calculate Your Household's Hydration Needs
Start with the baseline: one gallon per person per day. Count your household members, including children and pets. Decide your storage target. FEMA recommends a minimum of three days; most experts suggest two weeks. Add a safety margin for basic hygiene: another half-gallon per person per day. If you have pets, add their water needs. A large dog drinks about one gallon per day.
Write this number down. This is your target storage volume.
Step 2: Select and Prepare Your Containers
Choose containers appropriate for your available space. If you have a closet with multiple shelves, 5-gallon jerry cans stacked two or three high work well. If you're using under-bed storage, flat-pack containers are ideal.
Inspect containers before use. Look for cracks, discoloration, or any sign of damage. If using containers that previously held water, rinse them thoroughly with clean water. If using new containers, rinse them once to remove any dust or manufacturing residue.
Step 3: Fill, Treat, and Label Your Supply
Fill containers with tap water. If your tap water is chlorinated (most municipal water is), it already has some treatment. For tap water from a municipal source, add a small amount of bleach as a precaution: one drop per gallon.
Label every container with the fill date and any treatment applied. Use a permanent marker on the container itself. Store containers in their designated locations, distributing weight across multiple areas.
Step 4: Establish a Rotation Schedule
Set a rotation schedule and stick to it. Every six months, use your stored water for legitimate purposes, watering plants, washing windows, or filling a pool. Replace it with fresh water.
Create a simple calendar reminder. Mark your rotation dates in January and July, or any six-month interval that works for you.
Step 5: Test and Document Your System
Before relying on your system in an emergency, test it. Use your stored water to fill a pot and boil it. Taste it. Assess whether it's palatable.
Document your system with photos. Create a written guide for your household including the location of your water supply, the volume stored, the rotation schedule, and purification procedures.
Common Mistakes to Avoid
Most apartment dwellers who attempt water storage make predictable errors that undermine their preparedness.
Storing water in unsuitable containers. Re-purposed milk jugs or plastic containers that previously held non-food items contaminate water over time. Food-grade containers are essential.
Concentrating weight in one location. A stack of 200 pounds in a single closet corner creates a point load that can damage floors or ceilings. Distribute containers across multiple rooms and shelves.
Ignoring rotation schedules. Water stored for years without rotation may become contaminated. A six-month rotation schedule ensures your supply remains safe.
Storing water in warm or bright locations. Heat and light degrade containers. A cool dark closet is vastly superior to a garage or near a window.
Failing to treat tap water. Even municipal tap water benefits from a small amount of bleach as a precaution during storage.
Not accounting for space constraints realistically. Calculate your available space first, then determine realistic storage capacity.
Forgetting about pets. A large dog requires an additional gallon per day. Account for this in your target volume.
Storing water without labeling. Unlabeled containers create confusion during rotation. Labels take seconds and solve this problem.
Building a water storage system in a small apartment is entirely feasible when you understand the constraints and plan accordingly. The process requires no special skills, no expensive equipment, and no permanent modifications to your living space. Start with your household's actual needs, choose containers that fit your available space, and establish a rotation schedule. Within weeks, you'll have emergency water stored safely and invisibly throughout your apartment. When an emergency strikes, you'll be prepared while most of your neighbors scramble to find water. SHTF Prepper Club helps families build these systems with guidance tailored to real apartments and real constraints. The peace of mind that comes from knowing your family has water during a crisis is worth the modest effort required to set it up.
Frequently Asked Questions
How much water should I store per person for emergency preparedness?
FEMA water storage guidelines recommend storing one gallon per person per day for at least three days, though two weeks is ideal for longer-term emergency preparedness. For a family of four, that's a minimum of 12 gallons for three days or 56 gallons for two weeks. Account for cooking, sanitation, and hydration needs when calculating your household's total water supply requirement.
How long can stored water stay safe to drink?
Properly stored potable water in food-grade containers can remain safe for six months to several years, depending on storage conditions. Water stored in a cool dark place away from direct sunlight maintains better quality. Check water storage shelf life by rotating stock every six to twelve months and always inspect containers for signs of contamination before use during an emergency.
What's the best way to purify tap water before storing it for emergencies?
You can purify stored water using water treatment methods like adding bleach (16 drops per gallon of clear water, 32 drops for cloudy water), boiling, or using water filtration systems. Many people store bottled water directly, which requires no treatment. If using tap water, treat it with the appropriate bleach ratio or filtration before storage to ensure it remains safe for long-term storage and emergency use.
Can I store water in my apartment without it taking up too much space?
Yes. Stackable containers, jerry cans, and water storage solutions designed for apartments can fit under beds, in closets, or alongside existing furniture. Calculate your needs based on FEMA water storage guidelines, then choose space-saving containers that fit your layout. Rental-friendly options like under-sink storage or furniture-integrated solutions work well without permanent installation or excessive weight on flooring.
This article was written using GrandRanker