
Table of Contents
- Emergency Food Storage Ideas for Small Spaces
- How Much Emergency Food to Store for Your Household
- Best Containers for Emergency Food Storage
- Emergency Food Rotation System That Works in Apartments
- Apartment-Specific Safety: Heat, Pests, and Landlord Rules
- Choosing Space-Efficient Emergency Foods
- Frequently Asked Questions
Last Updated: October 8, 2026
Emergency Food Storage Ideas for Small Spaces
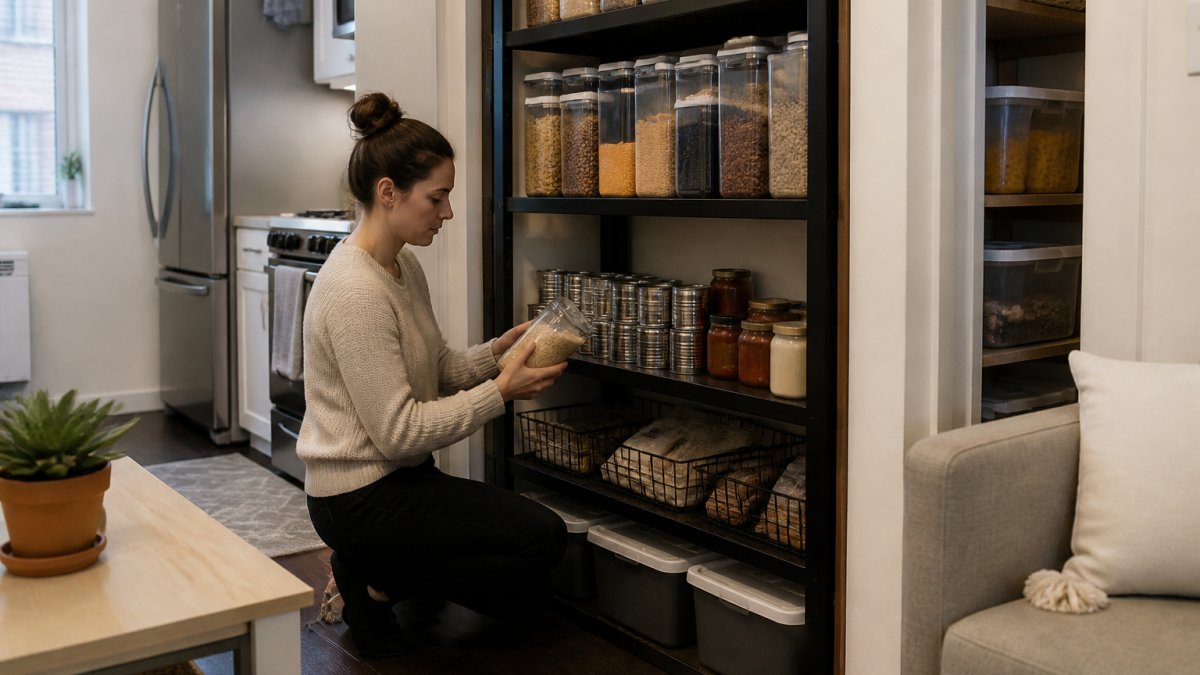
You do not need a basement or a spare closet to learn how to store emergency food in small apartments and build a real emergency food supply.
The average studio or one-bedroom unit has more usable storage than most renters realize. You just have to look lower, higher, and behind things.
Here is the good news: the best spots in an apartment are often the ones you never think about.
Under-Bed Storage: The Hidden Pantry
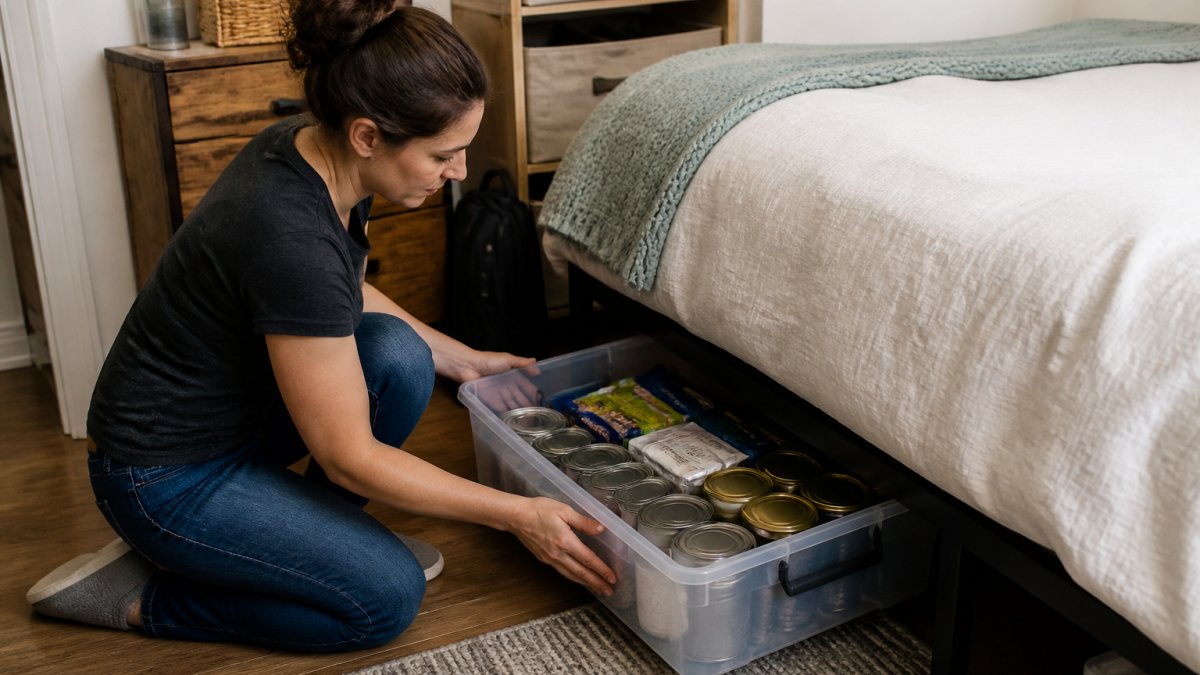
The space under a bed is the single best hidden pantry in an apartment. A standard bed frame holds several low-profile bins, and no one sees them.
Follow these steps:
- Measure the gap between the floor and the bed frame.
- Pick flat bins that fit that gap with an inch to spare.
- Line each bin with a lid to keep dust and pests out.
- Fill bins with canned goods, rice, pasta, and dry goods.
- Slide bins back and rotate them every few months.
Use rolling bins if you can find them. They pull out without scratching the floor, which matters in a rental.
Closet Conversions and Hanging Shelves
A coat closet can hold far more food than coats. Add hanging shelves and a shoe organizer on the door, and you gain vertical storage without losing floor space.
Try this layout:
- Top shelf: lightweight items like calorie bars and freeze-dried food
- Middle shelves: canned goods and jars
- Door organizer: small pouches, spices, and utensils
- Floor level: heavy bins with rice and pasta
A mini-pantry in a closet keeps food in a cool, dark spot, which is exactly what shelf-stable food needs.
How Much Emergency Food to Store for Your Household
Store at least a three-day supply of food and water for every person, then build toward two weeks. That is the baseline most preparedness guides and government agencies use for household readiness.
Calculating Calories and Servings
Do not count meals. Count calories. It is the only number that tells you whether your family will actually be fed.
Use this simple formula:
- Adults: about 2,000 calories per day
- Children: about 1,400 to 1,800 calories per day
- Multiply by the number of days you want to cover
- Divide by the calories per serving on each food package
| Household Size | 3-Day Target | 14-Day Target |
|---|---|---|
| 1 adult | 6,000 calories | 28,000 calories |
| 2 adults | 12,000 calories | 56,000 calories |
| 2 adults + 2 kids | 20,000 calories | 90,000 calories |
Write the total on a sticky note inside the closet door. It keeps you honest when you shop.
Best Containers for Emergency Food Storage
The best container for emergency food storage is one that seals tight, blocks light, and fits the space you have. The material matters less than the seal.
Glass vs. Plastic vs. Mylar
Each option has a clear job:
- Glass: Best for home use. It does not hold smells, and it keeps pests out. The downside is weight, which is a real problem on high shelves.
- Plastic: Light and cheap. Use food-grade bins with gasket lids. Thin plastic lets air in over time.
- Mylar: Best for long-term backup food. It blocks light and oxygen, and it packs flat when empty. Pair it with oxygen absorbers for grains and dry goods.
For apartment life, we recommend a mix. Use glass or sturdy plastic for everyday pantry rotation, and Mylar for the deep backup supply you hope never to open.
Emergency Food Rotation System That Works in Apartments
A rotation system keeps your oldest food moving out before it goes bad. In a small space, you cannot afford to lose food to spoilage, and you cannot afford to buy duplicates because you forgot what was already under the bed.
First-In, First-Out Labeling
First-in, first-out means you eat the oldest item first. It works in grocery stores, and it works in a closet pantry.
Set it up in four steps:
- Write the month and year on every can, bag, and pouch with a marker. Use a two-digit month and a four-digit year so the dates sort correctly when you scan them.
- Load new food behind or below the older food. In a deep under-bed bin, that means new cans go in the back and old cans stay in front.
- Pull from the front or top when you cook. If you cannot reach the front item without moving three others, the bin is packed too tight.
- Check the whole supply every three months. Tie the check to a recurring event you already have, like the start of a new season or a daylight saving time change.
A Simple Inventory System That Fits on Your Phone
A paper list gets lost. A phone note does not. Open a note and create four short columns: item, quantity, date stored, and date to rotate. Update it when you shop, not when you panic.
A common pattern that works in small apartments is the "one in, one out" rule.
For a deeper backup supply, use a marker and a piece of painter's tape on the lid. Write the month and year you stored it.
When to Rotate by Food Type
Not every food rotates on the same schedule. Use these common windows as a starting point, then follow the date printed on each package:
- Canned goods: rotate every 12 to 18 months
- Dry rice and pasta in Mylar: rotate every 24 to 30 months
- Peanut butter and nut butters: rotate every 12 months
- Calorie bars: rotate every 6 to 12 months
- Freeze-dried pouches: rotate every 24 to 36 months, or per the manufacturer's date
If a package has no date, write the date you bought it on the package the day you bring it home. That single habit turns an unlabeled can into a trackable item.
The Quarterly Reset
Once every three months, pull every bin out, wipe the floor underneath, and check for pests, moisture, or bulging cans. A bulging can is a sign of spoilage and should be discarded. This reset takes about 30 minutes for a typical one-bedroom apartment supply and prevents the two biggest causes of lost food: hidden spoilage and forgotten duplicates.
Apartment-Specific Safety: Heat, Pests, and Landlord Rules
Heat and pests ruin more apartment food supplies than anything else. Both are fixable with placement and a few cheap habits, but apartments create specific problems that a house with a basement does not.
Heat Zones to Avoid in a Small Apartment
Apartments concentrate heat in predictable places. Keep food out of these zones:
- Above the stove or fridge, where heat rises and lingers
- The top shelf of a cabinet next to the oven
- Direct sunlight from south- and west-facing windows
- Bathroom closets, which stay humid from showers
- Garage or balcony storage in hot months
- The space directly behind a running refrigerator or freezer
A simple test: put your hand on the shelf where you plan to store food. If it feels warm after the appliance has been running for an hour, it is too warm for long-term storage. Aim for a spot that stays below about 70°F and away from direct light.
Humidity and Condensation
Apartments often have plumbing or exterior walls inside closets. Those surfaces can sweat in humid months, and that moisture reaches food through cardboard and thin plastic.
If your apartment has a bathroom or kitchen on the other side of a closet wall, treat that closet as a higher-humidity zone. Use Mylar pouches or sealed containers there, and check the food more often.
Pest Prevention in a Rental
Pests enter apartments through shared walls, plumbing penetrations, and gaps under doors. You cannot seal the whole building, but you can seal your food.
- Canned goods and Mylar pouches are safe from most pantry pests.
- Cardboard boxes and open bags are not. Transfer dry goods into sealed containers or Mylar.
- Bay leaves and airtight bins help, but the seal is what works.
- Keep bins off the floor on a low shelf or a piece of plastic sheeting, which makes pests easier to spot.
- Check under-bed bins every three months for droppings or chewed packaging.
If you see signs of pests, remove the affected food, clean the area, and reseal everything before restocking.
Landlord Rules and Lease-Safe Storage
Check your lease before you drill or mount anything. Most leases allow freestanding shelving and over-the-door organizers, and those cover most of what you need. A renter-friendly setup also stays discreet, which matters if you host guests often.
Lease-safe options include:
- Over-the-door shoe organizers for small pouches and spices
- Freestanding wire shelving that does not attach to the wall
- Rolling under-bed bins that pull out without scratching the floor
- Tension rods for lightweight hanging shelves in a closet
- Adhesive hooks rated for the weight you plan to hang
Avoid blocking exits, windows, or HVAC vents with storage. In an emergency, you need clear paths, and blocked vents can raise humidity and heat in the room.
A Quick Safety Check
Once a season, walk through your storage spots and ask four questions: Is it cool? Is it dry? Is it sealed? Is it out of the way of exits and appliances? If the answer to any of those is no, move the food before you add more.
Choosing Space-Efficient Emergency Foods
The best emergency foods for an apartment are calorie-dense, shelf-stable, and compact. You are buying calories per cubic inch, not calories per dollar.
Calorie-Dense vs. Nutrient-Dense Options
Calorie-dense foods give you the most energy for the least space. Nutrient-dense foods give you vitamins and minerals. A good supply has both.
| Food Type | Why It Works | Storage Notes |
|---|---|---|
| Rice and pasta | Cheap, compact, filling | Mylar with oxygen absorbers |
| Canned goods | Ready to eat, no water needed | Cool, dark shelf |
| Peanut butter | High calories, long shelf life | Upright, away from heat |
| Freeze-dried food | Light, long shelf life | Reseal after opening |
| Calorie bars | No prep, fits anywhere | Keep in a go-bag too |
| Canned tuna and chicken | Protein without cooking | Rotate every year |
Add a food and water supply plan together. Water takes more space than food, so store it low and spread it out.
For households with dietary needs, build the supply around what your family already eats.
Use the three-day supply as your starter kit, then add a little each grocery trip. Small, steady additions beat one big panic buy.
Frequently Asked Questions
Where should you store emergency food in an apartment?
Store emergency food in cool, dark, dry spots away from stoves, radiators, and sunny windows. Good places include under-bed bins, the top shelf of a closet, or a dedicated corner of a pantry. Keep food off the floor to avoid pests and moisture. In small apartments, using vertical space with hanging shelves or stackable bins helps maximize storage without taking up living area.
How much emergency food should a household store?
A common starting point is a three-day supply for each person, then build to two weeks. The Federal Emergency Management Agency recommends at least a 3-day supply, but many preparedness experts suggest 14 days. Calculate based on 2,000 calories per adult per day. For a family of four, that's about 112,000 calories for two weeks. Adjust for children, elderly, and dietary needs. Store what you eat and rotate regularly.
Is it better to store food in glass or plastic?
Both have tradeoffs. Glass is non-porous, doesn't absorb odors, and is rodent-proof, but it's heavy and breakable. Plastic is lightweight and stackable, but some plastics can leach chemicals over time and may absorb smells. For long-term emergency storage, Mylar bags with oxygen absorbers inside food-grade buckets or bins are a common choice. Use glass for short-term rotation items like rice or pasta.
How do you keep emergency food organized and rotated in a small space?
Use a first-in, first-out (FIFO) system. Label each container with the date you stored it. Place newer items behind older ones. Keep a simple inventory list taped inside a cabinet door or on your phone. Once a month, check dates and move items nearing expiration to your daily kitchen shelf. This rotation prevents waste and ensures your emergency supply stays fresh and usable.