
Table of Contents
- How to Prepare for Disasters: Core Steps
- Building an Emergency Supply Kit Checklist
- Creating a Family Emergency Communication Plan Template
- How Long to Store Water for Emergencies
- Emergency Evacuation Plan Examples and Routes
- Hardening Your Home and Digital Preparedness
- Budget-Friendly Disaster Preparedness Tips
- Staying Informed: Emergency Alerts and Preparedness Drills
Last Updated: June 25, 2026
Knowing how to prepare for disasters is one of the most practical things any household can do, yet most families put it off until a crisis is already unfolding. According to FEMA's Ready.gov emergency preparedness guidance, fewer than half of American households have a documented emergency plan. This guide covers every core step, from identifying local hazards to protecting your digital assets, so you can build genuine readiness without the overwhelm.
Real preparedness is a system, not a supply closet.
How to Prepare for Disasters: Core Steps
Disaster preparedness is the process of planning, equipping, and training your household to survive and recover from emergencies before they occur. Start with a risk assessment before buying a single item. The hazards relevant to a family in coastal Florida differ entirely from those facing a household in tornado-prone Kansas or earthquake-prone California.
Assess Your Local Risks and Hazards
Hazard identification is the foundation of any effective preparedness plan. Check FEMA's National Risk Index for Communities to see which natural disasters pose the highest statistical risk in your county. This free tool maps flood zones, wildfire risk, hurricane tracks, and seismic activity down to the census-tract level.
Once you know your top three local threats, prioritize accordingly:
- Flood or hurricane risk: Focus on evacuation routes, waterproof document storage, and elevated supply caches
- Earthquake risk: Secure heavy furniture, store water separately from structural walls, and plan for infrastructure outages lasting weeks
- Wildfire or tornado risk: Prioritize rapid evacuation kits, air filtration, and shelter-in-place protocols
A well-calibrated risk assessment cuts your preparation time in half and makes every dollar you spend more effective.
Create Your Preparedness Plan
A preparedness plan is a written document that defines what your household will do, where it will go, and how it will communicate during and after an emergency. Write it down. A plan that exists only in your head fails the moment stress levels spike.
Your plan should address three core scenarios: shelter-in-place, local evacuation, and extended displacement. Decide in advance what conditions will prompt you to evacuate rather than waiting for an official order, which often comes later than ideal.
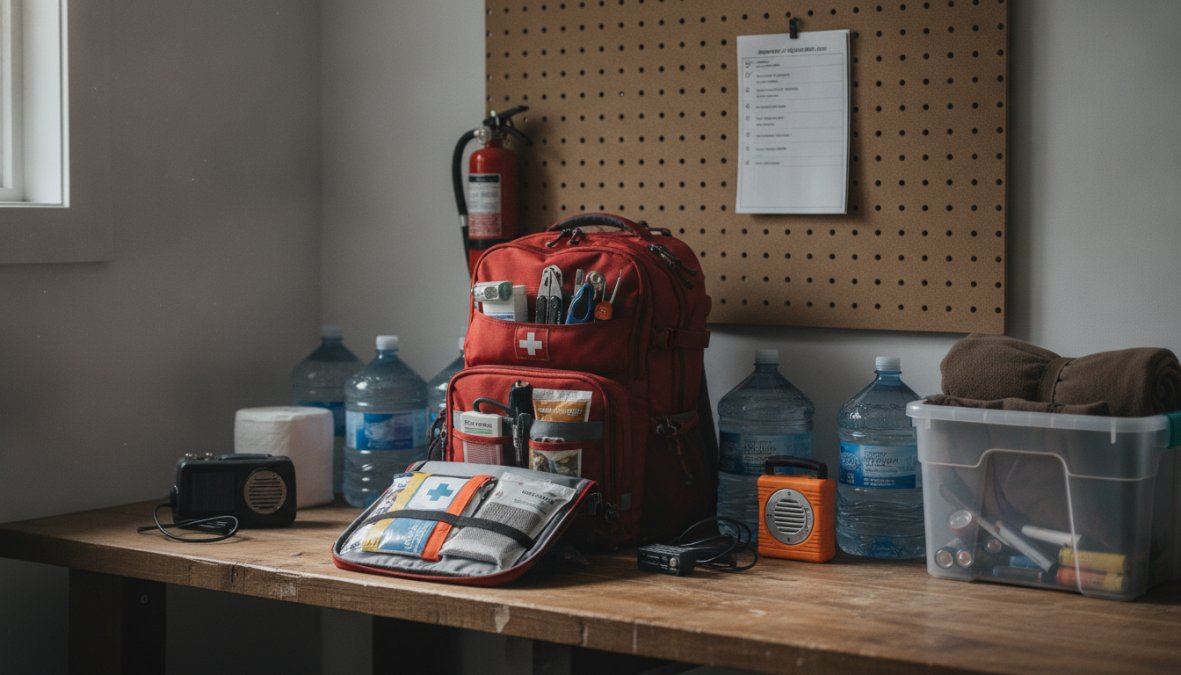
Building an Emergency Supply Kit Checklist
Every household needs a physical emergency supply kit stocked and accessible before a disaster strikes. The standard guidance recommends supplies for a minimum of 72 hours, though most experienced practitioners recommend two weeks as the realistic floor for major events.
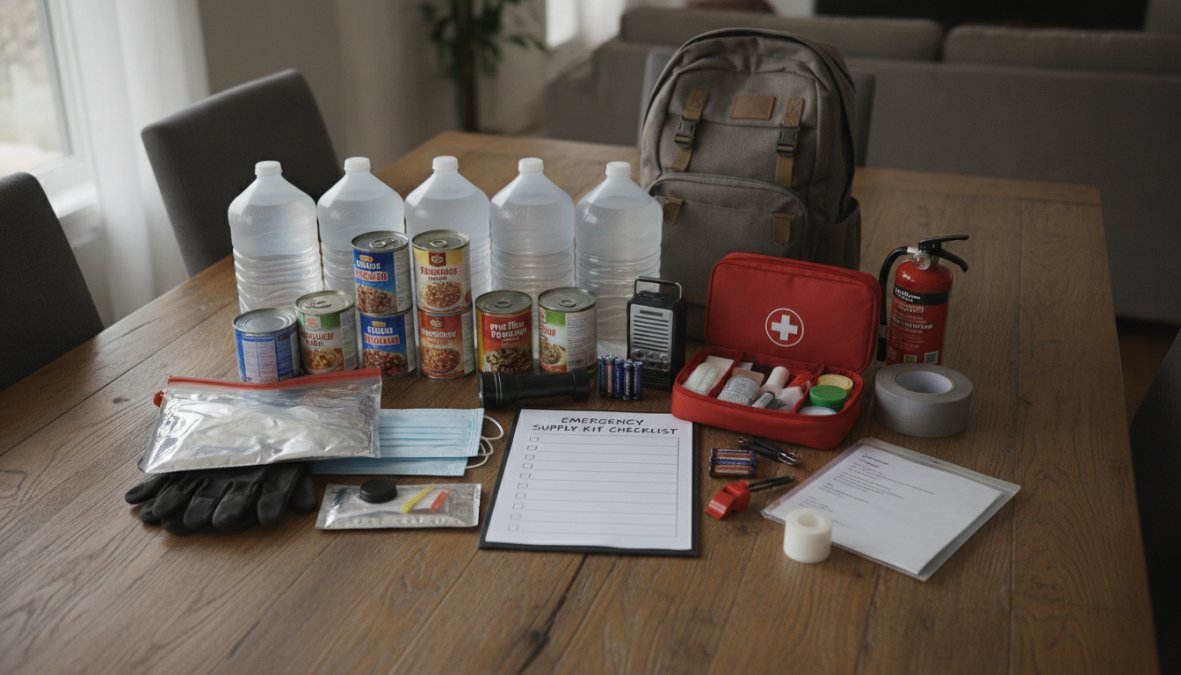
Water Storage and Non-Perishable Food
Water storage is the single most critical element of any emergency kit. The guideline is one gallon per person per day for drinking and basic sanitation. For a family of four preparing for two weeks, that means 56 gallons minimum.
Practical water storage options include commercial water bricks, WaterBOB bathtub liners (holds up to 100 gallons), and quality gravity-fed water filters for sourcing from alternative supplies.
For non-perishable food, prioritize caloric density and minimal preparation requirements. Freeze-dried meals, canned proteins, whole grains, and nut butters form a solid base. Rotate your food supply on a schedule, set a calendar reminder every 12 months to check expiration dates and replace what you've consumed.
First Aid, Power, and Safety Essentials
A complete emergency kit needs three additional categories: medical, power, and safety.
First aid kit essentials:
- Trauma bandages and tourniquets
- A 30-day supply of any prescription medications
- Copies of prescriptions and medical records in a waterproof bag
- Basic over-the-counter medications: pain relief, antihistamines, antidiarrheal
Power and communication:
- Hand-crank or solar emergency radio with NOAA weather band
- Portable battery bank with solar charging capability
- Headlamps with extra batteries
Safety and shelter:
- Mylar emergency blankets
- Dust masks rated N95 or higher
- A multi-tool and waterproof matches
Creating a Family Emergency Communication Plan Template
A family emergency communication plan is a documented set of contacts, meeting points, and communication protocols that every household member knows by memory. The plan exists because disasters frequently separate families and knock out local cell networks simultaneously.
Cell towers overload within minutes of a major disaster declaration. Your plan must work without them.
Emergency Contacts and Meeting Points
Every family member should know:
- A local meeting point (e.g., the front of your child's school)
- A regional meeting point outside your neighborhood (e.g., a specific relative's address)
- An out-of-state contact who can relay messages between separated family members
Out-of-state contacts are underused and undervalued. Local lines jam while long-distance calls often connect more reliably during regional disasters.
Write emergency contacts on a laminated card small enough to fit in a wallet or school backpack. Digital contacts disappear when phones die.
Communication During Power Outages
Power outages eliminate the tools most families rely on: smartphones, internet, and television. A battery-powered or hand-crank emergency radio becomes your primary information source for official emergency alerts and evacuation orders.
Text messages frequently get through when voice calls cannot. Teach every family member to send a brief status text before attempting a call.
For households with members who are deaf or hard of hearing, ensure that your emergency notification setup includes visual alerts, not just auditory ones.
How Long to Store Water for Emergencies
Store a minimum of two weeks of water for emergencies, calculated at one gallon per person per day. For a household of four, that is 56 gallons. For households in high-risk areas or with medical needs that increase hydration requirements, target 30 days.
Commercially sealed water has a shelf life of two years when stored in a cool, dark location. Tap water stored in clean, food-grade containers should be rotated every six months. Water treated with unscented liquid chlorine bleach (8 drops per gallon) extends usable storage life.
| Household Size | 72-Hour Minimum | 2-Week Target | 30-Day Extended |
|---|---|---|---|
| 1 person | 3 gallons | 14 gallons | 30 gallons |
| 2 people | 6 gallons | 28 gallons | 60 gallons |
| 4 people | 12 gallons | 56 gallons | 120 gallons |
| 6 people | 18 gallons | 84 gallons | 180 gallons |
Emergency Evacuation Plan Examples and Routes
Most people think of evacuation as a last resort. Experienced emergency managers treat it as the default response to certain threat types. Waiting too long to evacuate is responsible for a significant share of preventable disaster fatalities.
Identifying Evacuation Routes and Shelter Options
An emergency evacuation plan identifies at least two exit routes from your home, two routes out of your neighborhood, and two routes to your designated shelter or family meeting point. Redundancy is the point. A single planned route is a single point of failure.
Map your routes before you need them. Drive them. Note where bridges, underpasses, and low-lying roads might flood or become inaccessible. Identify the locations of public emergency shelters, which are typically listed on your county emergency management agency's website.
Keep a printed map in your vehicle. GPS and smartphone navigation fail during power outages and network congestion.
Preparing Children and Pets for Evacuation
Children and pets require specific preparation that generic evacuation plans overlook.
For children: Practice evacuation drills at home, ensure school-age children know the family communication plan and out-of-state contact number, and pack a small comfort kit in their go-bag with a familiar toy, a book, and a snack they like.
For pets: Many public emergency shelters do not accept pets. Identify pet-friendly shelters or hotels along your evacuation routes in advance. Keep vaccination records, a recent photo, and a 2-week supply of food and medication in your pet emergency kit. Microchip all pets and ensure registration information is current.
Hardening Your Home and Digital Preparedness
Physical home protection and digital preparedness are two sides of the same coin. Both matter.
Physical Home Protection Measures
Home hardening is the practice of modifying your physical structure to reduce damage from specific hazards. The right measures depend entirely on your local risk profile.
Common home hardening steps include: clearing defensible space for wildfire, installing hurricane straps and impact-resistant windows for high wind, installing backflow prevention valves for flood, and anchoring heavy furniture for earthquake.
Review your insurance policy annually. Many homeowners discover too late that standard policies exclude flood damage. Flood insurance through the National Flood Insurance Program requires a separate application and has a 30-day waiting period before coverage begins.
Protecting Vital Documents and Data Backup
Vital documents are among the hardest things to replace after a disaster and among the easiest to protect in advance. Create both a physical and digital backup of identification, financial records, medical information, and legal documents.
For physical storage, use a fireproof, waterproof document safe or a sealed waterproof bag in your go-bag. For digital backup, store encrypted copies in a cloud service and on a USB drive kept off-site. Back up photos, contact lists, and important files to cloud storage with automatic sync. After a disaster, the loss of irreplaceable family photos is frequently cited as one of the most emotionally devastating secondary losses.
Budget-Friendly Disaster Preparedness Tips
Preparedness does not require a large upfront investment. The most important resource is time spent planning, which costs nothing.
A practical approach for budget-conscious households:
- Start with the plan, not the gear. A written family emergency communication plan and a printed local hazard map cost nothing and deliver immediate value.
- Build your kit incrementally. Add two or three items per grocery run over 8-10 weeks to build a solid 72-hour kit without a single large expense.
- Repurpose what you already own. An old backpack becomes a go-bag. A camping stove becomes an emergency cooking option.
- Buy shelf-stable food you actually eat. This eliminates waste and keeps your supply naturally rotated.
- Check local emergency management resources. Many county offices distribute free preparedness guides through community resilience programs.
The cheapest disaster kit is the one you build slowly and actually maintain. A $500 kit bought in a panic and never touched again is less valuable than a $150 kit that's current, organized, and known to every family member.
Staying Informed: Emergency Alerts and Preparedness Drills
Staying informed during a disaster requires setting up your alert systems before the emergency. Emergency alerts and warning signals only protect you if you receive them in time to act.
Sign up for your local Wireless Emergency Alerts (WEA) system, which delivers text-based warnings directly to your phone. Most counties also offer opt-in emergency notification systems. Register for both.
A NOAA weather radio provides emergency notifications even during power outages and cell network failures. Keep one in your emergency kit and one in your bedroom.
Preparedness drills are the part most families skip, and they're the part that makes everything else work. Run a household drill twice a year: practice your evacuation route, verify that everyone knows the family meeting points, test that all kit items are accessible and unexpired, and confirm that your emergency contacts are still reachable.
According to FEMA's emergency preparedness research and community resilience resources, communities that conduct regular preparedness drills demonstrate measurably faster response times and lower injury rates during actual events. Connect with your neighbors, local CERT (Community Emergency Response Team) program, or neighborhood emergency preparedness group. Shared resources and local knowledge significantly improve outcomes for everyone on your block.
Frequently Asked Questions
What should be in a basic emergency supply kit?
A basic emergency kit should include at least one gallon of water per person per day, non-perishable food for several days, a first aid kit, flashlight, batteries, emergency radio, medications, important documents, and cash. Include items for specific needs like pet supplies or accessibility aids. Store everything in an easily accessible location and review it annually to replace expired items.
How long should you store water for emergencies?
Store at least one gallon of water per person per day for a minimum of three days, though two weeks is ideal. Properly stored water in food-grade containers away from sunlight can last indefinitely if sealed, though replacing it every six months ensures freshness. Label containers with the storage date and rotate stock regularly to maintain quality.
How do I create a family emergency communication plan?
Write down emergency contacts, establish an out-of-area contact person, identify meeting places, and teach children how to call for help. Include workplace locations and evacuation routes. Store copies in your emergency kit and give family members wallet-sized versions. Practice the plan quarterly and update it when circumstances change, such as job changes or school relocations.
What's the best way to prepare for disasters on a tight budget?
Start small by buying extra non-perishable food and water during regular shopping trips. Create a communication plan and evacuation routes at no cost. Use free resources from FEMA and Red Cross websites. Gradually build your kit over time rather than purchasing everything at once. Focus first on essentials, water, food, first aid, before buying specialized equipment.
Most households know they should prepare for emergencies but stall on where to start. SHTF Prepper Club simplifies the process with expert-vetted food, water, power, and safety gear designed specifically for family preparedness. From long-term food storage with up to 25-year shelf life to reliable water purification solutions, everything is curated to reduce complexity without cutting corners. Get started with SHTF Prepper Club and build the readiness your household deserves.
This article was written using GrandRanker