
Table of Contents
- Step 1: Choose the Right Container and Location
- Step 2: Stock Essential Wound Care Supplies
- Step 3: Add Medications and Tools
- Your Complete First Aid Kit Checklist
- How to Organize a First Aid Kit for Fast Access
- First Aid Kit Maintenance Tips: Inventory and Expiration Tracking
- Customizing Your First Aid Kit for Specific Needs
- Frequently Asked Questions
Last Updated: October 2, 2026
Step 1: Choose the Right Container and Location
Building a first aid kit for home starts with the container. A first aid kit is a defined, portable collection of medical supplies stored together so anyone in the household can find and use them during an injury or emergency. Get this step right and everything else becomes easier to organize, restock, and trust.
Pick the box before you buy a single roll of gauze.
A common mistake is choosing a container that's too small, you will add to this kit over time, and a cramped box forces you to leave things out.
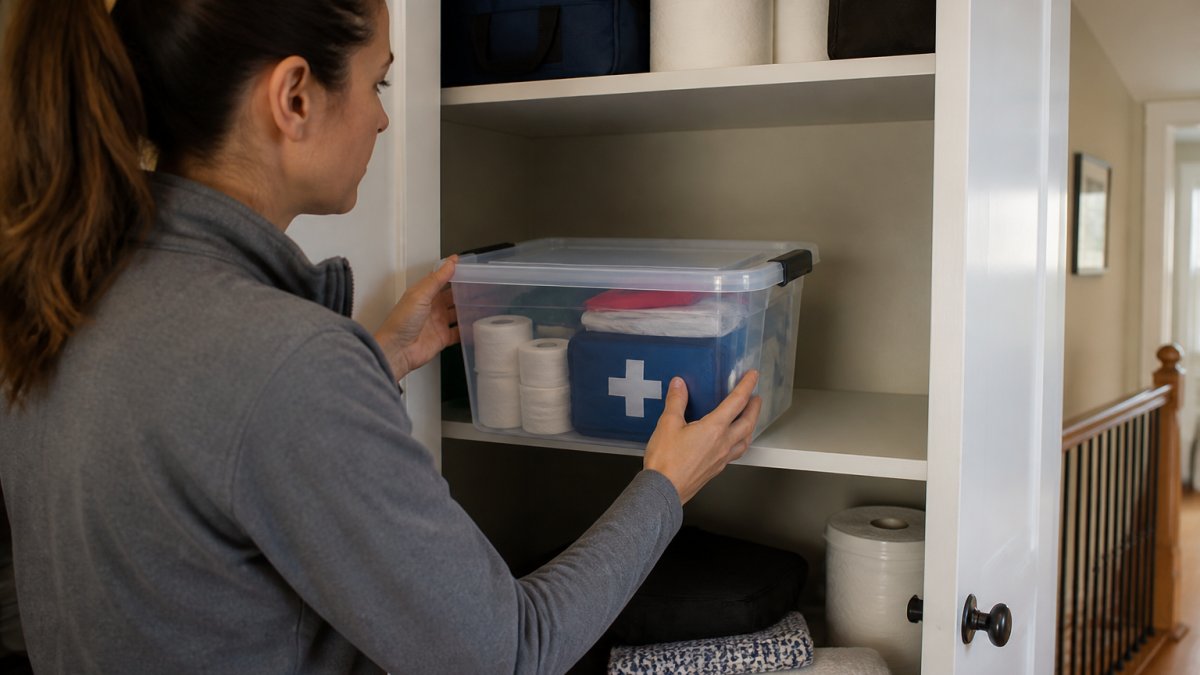
For location, choose one spot every adult can reach in under a minute, a hallway closet or kitchen cabinet beats a locked basement shelf. Tell every adult and older child where it lives, and keep a smaller travel kit in the car.
Step 2: Stock Essential Wound Care Supplies
Wound care supplies make up the core of any kit, because cuts, scrapes, and burns are the most common household injuries. Stock enough to treat several wounds without restocking mid-crisis.
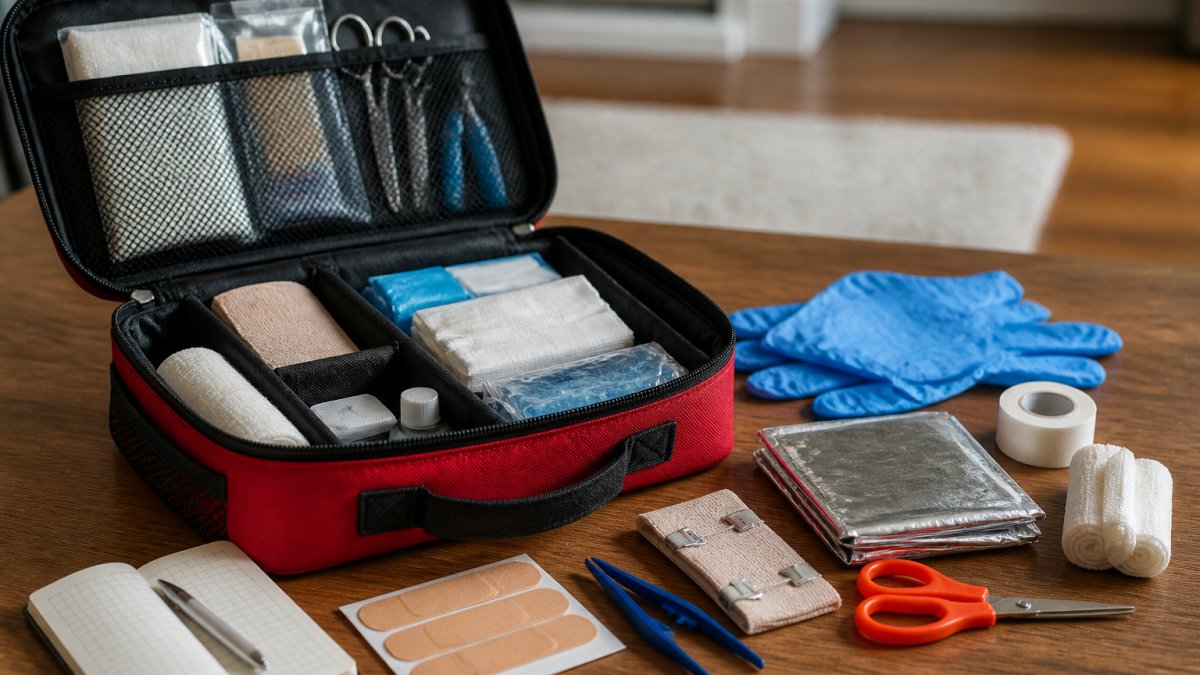
Start with sterile gauze in multiple sizes: pads cover wounds, rolls wrap and secure dressings on larger areas. Add adhesive bandages in assorted sizes, butterfly closures for wounds that must stay shut, and medical tape to hold gauze when bandages won't stick.
Cleaning supplies matter as much as covering supplies. Include antiseptic wipes, wound irrigation solution, and topical antibiotic ointment. For burns, add burn cream and non-stick dressings so gauze doesn't bond to damaged skin.
- Sterile gauze pads and rolls in 2-inch and 4-inch sizes
- Adhesive bandages in assorted shapes and sizes
- Medical tape and butterfly closures
- Antiseptic wipes and wound irrigation solution
- Topical antibiotic ointment, burn cream, and non-stick dressings
- Sterile eyewash
The American Red Cross first aid guidance recommends keeping supplies sealed until use and replacing anything that gets wet, since moisture compromises sterility.
Step 3: Add Medications and Tools
Medications and tools turn a box of bandages into a working kit. Pain relievers cover headaches, fever, and inflammation, while the right instruments let you remove a splinter or cut tape without improvising.
Over-the-counter medications to include:
- Aspirin and a non-aspirin pain reliever for adults
- Diarrhea medication and an antacid
- Oral antihistamine for allergic reactions
- Activated charcoal only if directed by a poison control professional
Tools belong in the same kit so nobody searches a junk drawer mid-emergency.
Protective gear protects the caregiver: nitrile gloves prevent blood contact, and a CPR face shield or mask adds respiratory protection during rescue breathing.
Poison Control guidance on activated charcoal use is clear that charcoal is not a universal antidote and should only be used under professional direction.
Your Complete First Aid Kit Checklist
Use this checklist as a printable inventory when you assemble and restock your kit.
| Category | Items to Include | Replacement Note |
|---|---|---|
| Wound care | Sterile gauze, adhesive bandages, medical tape, butterfly closures | Replace if packaging is torn or wet |
| Cleaning | Antiseptic wipes, wound irrigation, topical antibiotic, burn cream | Check expiration dates twice a year |
| Medications | Aspirin, non-aspirin pain reliever, antihistamine, diarrhea medication | Replace at expiration |
| Tools | Tweezers, trauma shears, thermometer, flashlight | Test batteries every six months |
| Protection | Nitrile gloves, CPR face shield | Replace gloves if they tear or dry out |
| Extras | Sterile eyewash, emergency blanket, instant cold pack | Inspect seals annually |
This first aid kit checklist covers the essentials for a household of four. Larger families should scale quantities up, not the variety of items.
How to Organize a First Aid Kit for Fast Access
Organization decides whether your kit works under pressure. When someone is bleeding, you have seconds, not minutes, to find gauze. Group supplies by function rather than tossing everything into one compartment.
Use clear zip pouches or labeled dividers for four groups: wound care, medications, tools, and protection. Put bandages and antiseptic wipes at the top or front, and keep medications in original labeled packaging so dosages stay visible.
If you want to know how to organize a first aid kit for multiple people, add a small card listing each family member's known allergies and current medications. First responders look for this information first.
First Aid Kit Maintenance Tips: Inventory and Expiration Tracking
Most guides say "check your kit twice a year" and stop there. That fails because it treats maintenance as a single event instead of a system, supplies expire on different clocks, and a kit complete in January can be missing its most important item by July. The fix is an inventory management system, not a reminder.
Expiration dates are not uniform across categories:
- Adhesive products (bandages, medical tape, butterfly closures) degrade fastest. The adhesive dries out and the backing stops peeling cleanly. Most manufacturers print a shelf life of roughly three to five years, but heat and humidity shorten that dramatically.
- Ointments and creams (topical antibiotic, burn cream, hydrocortisone) typically carry a two- to three-year expiration. Once opened, they should be treated as good for about one year, since contamination and separation begin at first use.
- Antiseptic wipes and irrigation solution usually hold a two- to three-year date. Wipes dry out once the foil pouch is compromised, so inspect seals, not just dates.
- Over-the-counter medications (aspirin, non-aspirin pain reliever, antihistamine, antacid, diarrhea medication) generally run one to three years from manufacture. Liquids and chewables expire faster than tablets.
- Sterile items (gauze, non-stick dressings, eyewash) stay sterile only while the packaging is intact. A pinhole in a gauze wrapper means it is no longer sterile, regardless of the printed date.
- Batteries in flashlights and thermometers lose charge sitting idle. Alkaline batteries can leak and corrode the device, so pull them if the kit will sit unused for months.
Build a Tracking System That Actually Works
A shared phone note or spreadsheet is enough, no app needed. The system only needs three columns:
- Item name
- Expiration date (or "inspect" for items without one)
- Quantity on hand
Update the row when you restock, and log items the same day you use them, a kit not restocked after use fails the next time. Keep a small notepad inside the lid so anyone who takes an item can log it immediately.
Set two recurring calendar reminders: a monthly glance for anything missing or opened (under a minute), and a full six-month audit to open every package, test every battery, and replace anything compromised.
Disposing of Expired and Contaminated Supplies
Expired medications and used supplies cannot simply go in the kitchen trash without thought. The FDA guidance on medication disposal explains that most medications should not be flushed, because trace amounts reach waterways. The safer route for most households is a drug take-back program. Many pharmacies, hospital lobbies, and police stations maintain permanent collection kiosks, and the Drug Enforcement Administration runs periodic national take-back days. If no take-back option is available, the FDA advises mixing most medications with an unpalatable substance such as used coffee grounds or cat litter, sealing the mixture in a bag, and placing it in household trash, but only after removing or scratching out personal information on the label.
A few medications are on the FDA's flush list because they are dangerous enough that the risk of accidental ingestion outweighs the environmental concern. Check the current list before you decide.
Used wound-care supplies, bloody gauze, used gloves, contaminated dressings, should go into a sealed plastic bag before entering household trash; never place loose bloody gauze in an open bin.
Sharps are a separate category.
Restock Before You Need To
Do not wait for an emergency to discover a gap. Keep a small "reserve" pouch of the highest-use items, adhesive bandages, antiseptic wipes, gauze pads, and gloves, so you can refill the main kit without a shopping trip. When the reserve drops below half, reorder. This two-tier approach is the biggest difference between a kit that works and one that only looks complete.
Customizing Your First Aid Kit for Specific Needs
No single kit fits every household, age, medical conditions, pets, and environment all change what belongs inside. Most guides treat "customization" as a short list of add-ons, but each household type needs a different core, not just a few extra items.
Households With Infants and Toddlers
Young children need supplies sized to their bodies and dosed to their weight. Add:
- A digital rectal or temporal thermometer, infant dosing decisions depend on an accurate temperature, and ear thermometers are unreliable under about six months.
- Infant and children's fever reducer in the correct concentration. Note that infant drops and children's liquid are often different strengths, so keep both labeled and separated from adult medications.
- A nasal aspirator and saline drops for congestion, which is the most common reason parents reach for a kit.
- Small adhesive bandages and gentle paper tape, since adult-size bandages will not stay on tiny fingers.
- A medicine dosing syringe or dropper with clear markings. Kitchen spoons are not accurate enough for infant medication.
- A current weight and dose card. Pediatric doses are weight-based, and first responders and urgent-care staff will ask.
Keep all children's medications in a separate, clearly labeled pouch. Mix-ups between adult and pediatric doses are one of the most common household medication errors.
Households Caring for Elderly Relatives
Older adults often manage multiple prescriptions, which changes what the kit needs:
- A complete, current medication list with dosages, prescriber names, and pharmacy phone numbers. Keep a paper copy in the kit and a photo on each adult's phone.
- A seven-day supply of any critical daily prescription in the kit itself, rotated before it expires. Power outages, storms, and evacuation orders are the most common reasons doses get missed.
- A blood pressure cuff and a glucose meter if a physician has recommended home monitoring.
- A pill organizer and a spare set of hearing-aid batteries if applicable.
- A medical alert card listing conditions, allergies, and emergency contacts, kept at the top of the kit where a responder will see it first.
Households With Pets
Pets are the most overlooked category in home first aid guides. A dog or cat can be injured in the same emergency that injures a person, and human medications are frequently toxic to animals. Add a separate pet pouch containing:
- Veterinary-approved antiseptic that is safe if licked, plus gauze and self-adhering wrap (which stays on fur better than tape).
- A tick removal tool and a flea comb.
- A muzzle or soft cloth strip, an injured animal may bite even a familiar handler, and a makeshift muzzle protects both of you.
- A copy of vaccination records and your veterinarian's phone number, plus the number for a 24-hour animal poison control line.
- A pet-specific first aid reference. Do not assume human dosing translates; many common human pain relievers are dangerous to dogs and cats.
Environment and Location
Where you live shapes quantities and portability more than variety:
- Disaster-prone areas (hurricane, wildfire, flood, tornado zones) need a portable duplicate kit that fits in a go-bag, plus extra water, a battery or hand-crank radio, and a supply of any daily prescriptions.
- Rural homes with long emergency response times should carry more wound-care supplies, a broader medication range, and a tourniquet with training on how to use it. Minutes matter when help is far away.
- Apartments and small homes benefit from a compact, wall-mounted or under-sink kit with the same core categories but smaller quantities.
- Homes with workshops, pools, or chemical storage should add sterile eyewash, a burn-specific dressing, and a chemical-splash reference card.
Households With Specific Medical Conditions
If anyone in the home has a known condition, the kit should reflect it:
- Severe allergies: non-drowsy antihistamine plus prescribed epinephrine auto-injectors, with a note on where they are stored and their expiration dates.
- Asthma: a spare rescue inhaler and a spacer.
- Diabetes: glucose tablets or gel, a glucose meter, and a note about insulin storage if applicable.
- Heart conditions: chewable aspirin, and a printed copy of the person's cardiac history.
- Seizure disorders: a seizure action plan and any rescue medication prescribed.
If you'd rather skip the guesswork, SHTF Prepper Club offers expert-vetted preparedness gear and step-by-step guides so your household stays ready without the fear. Our curation focuses on family-oriented preparedness, and our team walks you through what you need rather than handing you a box and wishing you luck.
Frequently Asked Questions
Is it cheaper to make your own first aid kit or buy one?
Building your own first aid kit often costs less than buying a pre-assembled kit because you can choose the exact items and quantities you need without paying for extras. You also avoid duplicate items you already have at home. However, pre-made kits save time and ensure you don't miss essentials. Many families start with a basic kit and add to it over time, which spreads out the cost.
What are 10 things you should have in a home first aid kit?
A well-stocked home first aid kit should include sterile gauze pads, adhesive bandages in various sizes, medical tape, antiseptic wipes, topical antibiotic ointment, nitrile gloves, tweezers, trauma shears, a thermometer, and pain relievers like acetaminophen or ibuprofen. Add a first aid guide and emergency contact list. These items cover wound care, infection prevention, and basic health monitoring for common household injuries.
How often should you check and restock your home first aid kit?
Check your first aid kit every six months and after any major incident where supplies were used. Set a reminder for spring and fall when you change smoke detector batteries. During each check, look for expired medications, damaged packaging, and missing items. Replace anything that's expired or running low. A regular maintenance schedule ensures your kit is always ready when you need it.
What are the best storage containers for a DIY first aid kit?
Choose a waterproof container with a secure latch and a handle for portability. Clear plastic storage boxes work well because you can see the contents without opening them. For larger households, consider a soft-sided bag with compartments or a wall-mounted cabinet. Avoid cardboard boxes, which can get damaged by moisture. Label the container clearly and store it in an accessible location away from heat and direct sunlight.