
Table of Contents
- Why Emergency Preparedness Matters for Your Family
- Creating a Family Emergency Plan Template
- Building Your Emergency Supply Kit Checklist
- 72-Hour Emergency Kit Essentials Explained
- Disaster Preparedness for Kids: Teaching Children Safety
- Establishing Your Family Communication Plan
- Practicing Household Drills and Evacuation Procedures
- Budget-Friendly Emergency Preparedness Tips
- Digital Preparedness: Protecting Your Family's Information
- Your Emergency Preparedness Guide Starts Today
Emergency Preparedness Guide for Families: 9 Steps
Last Updated: June 27, 2026
Why Emergency Preparedness Matters for Your Family
When disaster strikes, families without a plan scatter. Minutes matter, and confusion costs lives. An emergency preparedness guide for families gives you the structure to act decisively when stress is highest and thinking is hardest.
Natural disasters, power outages, medical emergencies, and unexpected disruptions happen without warning. Your family's survival depends on knowing exactly what to do, not on hoping for the best.
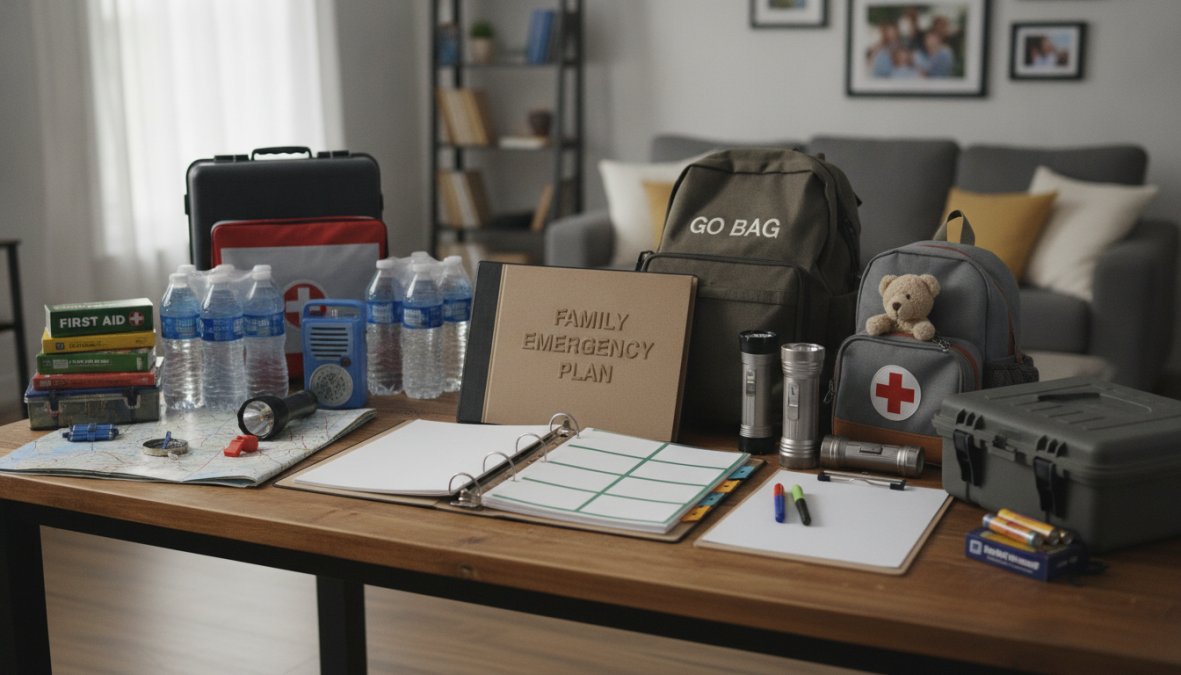
Creating a Family Emergency Plan Template
Your emergency plan must address three core scenarios: shelter-in-place (staying home safely), evacuation (leaving quickly), and communication (staying connected when systems fail). Everyone in the household must understand the plan before an emergency happens.
Start by mapping your home's hazards. Where are the gas shutoffs? Which rooms are safest during severe weather? Document these on a simple diagram and post it visibly. Assign specific responsibilities to each family member based on age and capability.
Designate a Family Meeting Point
Families separate during emergencies. Choose two meeting locations: one within your neighborhood (a specific tree in a park or a neighbor's house) and one outside your immediate area (a relative's home in a different city). Write these addresses on a card each family member carries and teach children to memorize at least one.
Document Emergency Contacts and Vital Records
Write down phone numbers of all family members, your doctor, local emergency services, and trusted neighbors. Keep this list in your emergency supply kit and give copies to each family member.
Gather vital records, birth certificates, insurance documents, property deeds, medical histories, and store them in a waterproof, fireproof container. Consider keeping digital copies in a secure cloud account accessible from multiple devices.
Building Your Emergency Supply Kit Checklist
An emergency supply kit keeps your family safe during the critical first 72 hours when normal systems fail. Build your kit with your actual family in mind, accounting for specific needs like medications, allergies, and chronic conditions.
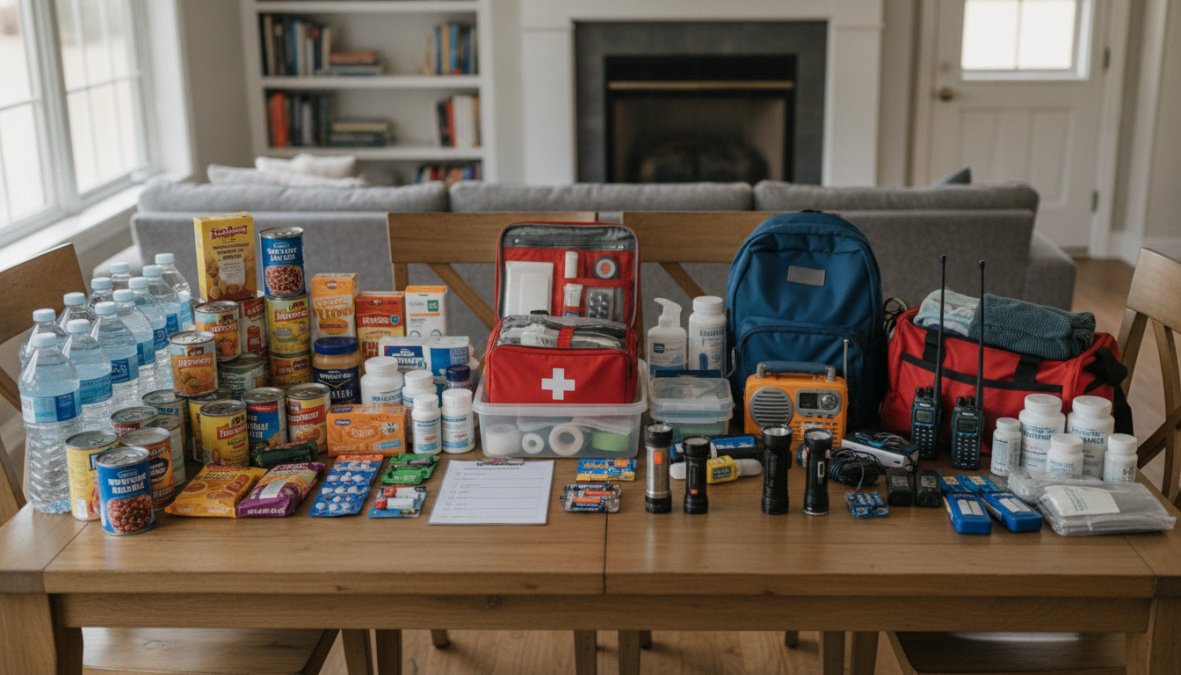
Water, Food, and First Aid Essentials
Store one gallon per person per day for at least three days. Rotate bottled water annually and consider a water filtration system.
Non-perishable food should require no cooking and minimal preparation. Include foods your family actually eats, canned goods, granola bars, peanut butter, crackers, and dried fruit. Pack a manual can opener.
First aid supplies must include pain relievers, anti-diarrhea medication, antihistamines, and any prescription medications your family members take regularly. Store a two-week supply of essential medications in your emergency kit, rotating them to keep them current.
Tools, Light, and Power Solutions
Include multiple light sources: flashlights, headlamps, glow sticks, and a battery-powered or hand-crank radio. Test batteries regularly and replace them annually.
A basic tool kit should include a multi-tool, adjustable wrench, screwdrivers, and a hammer. Include a fire extinguisher rated for multiple fire types and a portable phone charger.
72-Hour Emergency Kit Essentials Explained
Your 72-hour emergency kit is a portable subset of your larger supplies, designed for rapid evacuation. Use a sturdy backpack or duffel bag for each family member, stored near your exit routes.
Include water, non-perishable food, medications, important documents, basic first aid supplies, a change of clothes, sturdy shoes, and a blanket or sleeping bag per person. Add cash in small bills and a list of emergency contacts and meeting points. Update seasonally.
Disaster Preparedness for Kids: Teaching Children Safety
Children who understand disaster preparedness stay calmer during actual emergencies. Knowledge brings confidence; fear comes from uncertainty.
Age-Appropriate Lessons and Psychological First Aid
Young children (ages 4-7) need to know basic safety concepts: where to go during severe weather, how to call 911, and what to do if separated from parents. Teach them to recognize sirens and weather alerts. Make practice feel like a game rather than a scary exercise.
School-age children (8-12) can understand cause and effect. Show them where supplies are stored and let them help pack the emergency kit. This builds competence and reduces anxiety through participation.
Teenagers can handle complex information. Teach them practical skills: how to turn off gas, where to find important documents, how to operate a fire extinguisher. Give them responsibility for younger siblings' safety during drills.
During an active emergency, stay calm and speak in a steady voice; children mirror your emotional state. Provide clear, simple instructions and avoid graphic explanations.
Immediately after an emergency, normalize the experience without minimizing it. Maintain routines as much as possible, regular meals, sleep schedules, and familiar activities. Let children talk about their experience without forcing them to.
In the days and weeks following, watch for signs of ongoing distress: persistent nightmares, regression, withdrawal, or difficulty concentrating. These are common trauma responses. Maintain connection and consider professional support if symptoms persist beyond a few weeks.
School and Daycare Coordination
Your family emergency plan must align with your child's school or daycare emergency protocols. Contact the school and request their emergency procedures documentation. Ask where children shelter during severe weather, what the evacuation route is, how parents are notified, and what the reunification process is.
Teach your child the school's emergency procedures alongside your family plan. If your child is picked up by someone other than you, ensure that person knows your family's meeting points and communication plan.
Making Preparedness Engaging, Not Frightening
Frame emergency drills as practice, like sports or music lessons, not as scary "what-ifs." Use games and role-play. Let children help assemble supplies and choose snacks for the emergency food kit. Read age-appropriate books about disasters and preparedness.
Avoid catastrophizing. Focus on what your family will do, not on what might go wrong. "We have a plan" is far more reassuring than "Disasters are really scary."
Establishing Your Family Communication Plan
When disaster strikes, phone lines fail. Your family communication plan ensures you can reach each other even when normal systems fail.
Designate an Out-of-Area Contact Person
When local phone lines fail, long-distance lines often still work. Establish an out-of-area contact person, a relative or friend who lives at least 100 miles away. This person becomes your family's central communication hub.
Choose someone reliable and willing to take on this role. Write down their full name, phone number, and email address. Give copies to every family member, including children old enough to use a phone. Confirm with your contact that they understand their role.
Create a Multi-Channel Communication Protocol
No single communication method works in all emergencies.
Primary method: Text messaging. Text messages often get through when voice calls fail. Establish that family members should text the out-of-area contact first, then attempt to reach each other directly. Use a simple message format: "[Name] is safe at [location]. Status: [okay/injured/need help]."
Secondary method: Email. If cell networks are down but internet is available, email can work. Designate an email account that serves as a message board where family members post status updates.
Tertiary method: Social media. Establish a private family group where members post status updates.
Backup method: In-person meeting. If all electronic communication fails, your designated meeting points become your communication method. Family members go to the neighborhood meeting point at a specific time each day to check for other family members.
Establish a Check-In Schedule and Protocol
For short-term emergencies, establish a check-in time every 2-4 hours. For longer emergencies, establish a daily check-in time, perhaps 6 PM each evening. Write down the check-in times and include them in your emergency contact cards.
Prepare for Communication During Different Scenarios
Earthquake or sudden disaster: Text messaging is your best option in the first hours. Expect delays; messages may take hours to send.
Severe weather or tornado: If you have warning, communicate before the event. After the event, cell towers may be damaged.
Extended power outage: Cell phones will work until batteries die. Establish a charging protocol and a meeting point for in-person communication if electronic communication fails.
Evacuation: Text your out-of-area contact with your destination before you leave, if possible. Include the route you're taking.
Document and Distribute Contact Information
Create a physical emergency contact card for each family member, small enough to fit in a wallet. Include the out-of-area contact person, each family member's phone number, home address and phone number, workplace phone numbers, school or daycare phone numbers, doctor's phone number and pharmacy information, insurance company phone numbers, local emergency services, and a trusted neighbor's phone number.
Laminate these cards or place them in plastic sleeves. Give one to each family member and keep extras in your emergency kit, your car, and your desk at work. Store a digital copy in your phone's contacts and in a cloud account.
Practice Your Communication Plan
Practice your protocol quarterly. Simulate a scenario where family members are separated and must use your communication plan. Test your out-of-area contact's ability to participate. Practice using backup communication methods.
After each drill, discuss what worked and what didn't. Identify problems and fix them before a real emergency.
Practicing Household Drills and Evacuation Procedures
Plans fail when untested. Household drills transform your emergency preparedness guide from theory into muscle memory. Run evacuation drills quarterly. Pick a scenario, severe weather, gas leak, or fire, and practice your response. Time how long it takes everyone to reach the designated meeting point and identify obstacles or delays.
Shelter-in-place drills are equally important. Practice moving to your designated safe room, securing doors and windows, and accessing your emergency supplies. Ensure everyone knows how to turn off utilities if necessary.
Make drills realistic but not traumatic. Afterward, discuss what went well and what needs improvement.
Budget-Friendly Emergency Preparedness Tips
Emergency preparedness doesn't require wealth. Start with water and non-perishable food by buying one extra can or package each time you grocery shop. Within months, you'll have a substantial supply.
Build your first aid kit gradually. Buy a few items each time you visit a pharmacy. Generic medications cost less than brand names and work identically. Ask your doctor for a small supply of prescription medications to keep in your emergency kit.
Gather free or cheap supplies from around your home. Old blankets become emergency warmth. Clean plastic bottles store water. Canned goods from your pantry fill your emergency food supply.
Prioritize based on your family's specific risks. If you live in an earthquake zone, invest in securing heavy furniture. If you live in a flood-prone area, focus on water-resistant storage. If you live where severe winter weather is common, prioritize heating supplies.
Digital Preparedness: Protecting Your Family's Information
Store digital copies of vital documents in a secure cloud account accessible from multiple devices. Include birth certificates, insurance policies, property deeds, medical records, and financial account information. Use strong passwords and two-factor authentication.
Create a master password list stored in a secure location. Include passwords for email, financial accounts, and cloud storage. Update this list when passwords change.
Maintain updated contact information in your phone and in physical form. Back up your phone regularly to ensure you don't lose irreplaceable photos, videos, and documents.
Your Emergency Preparedness Guide Starts Today
Creating an emergency preparedness guide for families requires planning, but it doesn't require perfection. Start with one element: designate your family meeting points this week. Next week, gather vital documents. The week after, build your first emergency supplies.
Families that prepare survive emergencies. Families that practice their plans respond with confidence rather than panic.
Building comprehensive emergency preparedness takes time, but SHTF Prepper Club simplifies the process with vetted emergency supplies, food storage solutions with up to 25-year shelf life, and water filtration systems designed for household emergencies. Our expert-curated kits eliminate the guesswork. Start with one of our family preparedness bundles and add to your supplies as your budget allows.
| Element | Priority | Timeline | Cost Range |
|---|---|---|---|
| Meeting points & contacts | Critical | Week 1 | Free |
| Vital documents gathering | Critical | Week 2-3 | Free-$50 |
| Water storage (1 gal/person/day) | Critical | Week 2-4 | $30-75 |
| Non-perishable food (3-day supply) | Critical | Week 3-8 | $50-150 |
| First aid supplies | High | Week 4-6 | $30-75 |
| Flashlights & batteries | High | Week 5-7 | $25-60 |
| Medications & medical equipment | High | Week 4-6 | Varies |
| Communication plan practice | High | Week 8 | Free |
| Evacuation drills | High | Monthly | Free |
| Extended supplies (2+ weeks) | Medium | Ongoing | Varies |
CDC Emergency Preparedness and Response Guide
FEMA Family Preparedness Resources
American Red Cross Family Disaster Plan
Frequently Asked Questions
What should be in a family emergency preparedness kit?
A comprehensive emergency supply kit should include bottled water (1 gallon per person daily for 3+ days), non-perishable food, first aid supplies, flashlights, batteries, a battery-powered or hand-crank radio, medications, important documents, cash, and basic tools. For families with infants, include diapers and formula. Add special health care needs items like medical equipment or prescriptions. A 72-hour emergency kit is the foundation, extend it for longer-term preparedness based on your family's specific needs and local disaster risks.
How do I create a family emergency communication plan?
Start by establishing an out-of-area emergency contact person your family can reach if local lines are down. Write down all emergency contacts and share them with every family member. Identify a meeting point outside your home in case you're separated. Teach children how to call 911 and share your address. Practice your plan quarterly. Consider a family emergency plan template to document evacuation routes, shelter-in-place locations, and special care needs. Store copies with emergency supplies and give one to trusted neighbors or relatives for reference during crisis resources situations.
What are the 4 steps of emergency preparedness for families?
The four core steps are: (1) Plan, create a household disaster plan with evacuation procedures and communication strategies; (2) Prepare, assemble an emergency supply kit with survival essentials like water, food, and first aid supplies; (3) Practice, conduct household disaster drills and evacuation exercises regularly; (4) Educate, teach family members, especially children, about disaster readiness through age-appropriate lessons and psychological first aid concepts. This framework ensures your family has both physical supplies and mental readiness for any emergency situation.
How often should you practice your family emergency plan and drills?
Practice your household emergency drills at least twice a year, ideally once every six months. This frequency keeps procedures fresh in everyone's mind and identifies gaps in your plan. Include evacuation route practice, shelter-in-place scenarios, and communication plan drills. For families with young children or those in high-risk areas, quarterly practice (every three months) is ideal. After any major life change, moving, new family member, job change, review and practice your emergency management plan again to ensure it remains current and relevant.
This article was written using GrandRanker