
Table of Contents
- 5 Cheap Emergency Food Storage Ideas at a Glance
- Idea 1: Buy Bulk Staples and Store in Food-Grade Buckets
- Idea 2: Stock Affordable Canned Goods from Your Grocery Store
- Idea 3: Use Mylar Bags and Oxygen Absorbers for Long-Term Preservation
- Idea 4: Buy Discounted 72-Hour Emergency Kits as a Starting Point
- Idea 5: Build a DIY Emergency Food Supply Week by Week
- Long-Term Food Storage on a Budget: Maximizing Your Investment
- Common Mistakes That Waste Money on Emergency Food Storage
5 Cheap Emergency Food Storage Ideas That Work
Last Updated: August 1, 2026
Building emergency food storage on a tight budget doesn't require a second mortgage or warehouse-sized basement. At SHTF Prepper Club, we've helped thousands of families establish reliable food reserves by focusing on cost-effective storage methods that deliver results. Strategic bulk buying, smart containers, and disciplined rotation create months-long supplies for less than most families spend on groceries monthly. Below are five proven approaches with real costs, storage solutions, and common mistakes to avoid.
5 Cheap Emergency Food Storage Ideas at a Glance
| Idea | Best For | Time Investment | Storage Space |
|---|---|---|---|
| Bulk staples in food-grade buckets | Long-term storage (20+ years) | Minimal setup | Moderate |
| Affordable canned goods from grocery stores | Quick rotation, familiar foods | Weekly shopping | Flexible |
| Mylar bags with oxygen absorbers | Extended shelf life on dry goods | 1-2 hours per batch | Compact |
| Discounted 72-hour emergency kits | Starter supply, grab-and-go backup | None required | Minimal |
| Weekly incremental building | Gradual affordability, customization | 30 minutes per week | Flexible |
Idea 1: Buy Bulk Staples and Store in Food-Grade Buckets
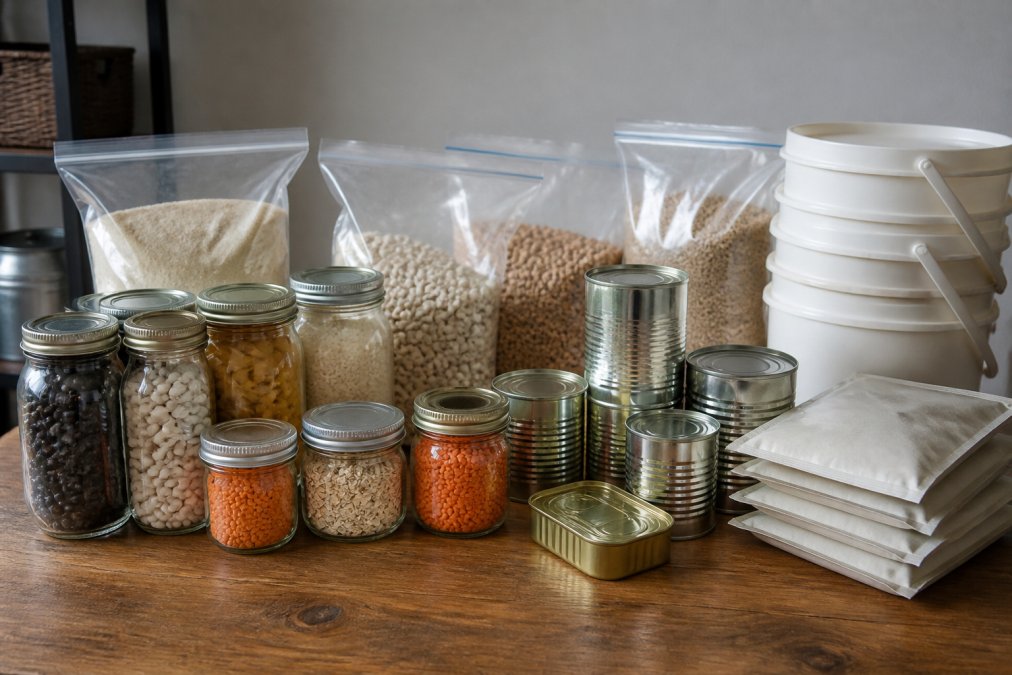
Nothing delivers more calories per dollar than buying bulk staples and sealing them in food-grade containers. Rice, beans, oats, flour, and pasta form the foundation of cheap emergency food storage because they're shelf-stable, nutrient-dense, and cost 50 cents to $2 per pound when purchased in 25-50 pound quantities from restaurant supply stores or online retailers.
What to buy and how much to spend
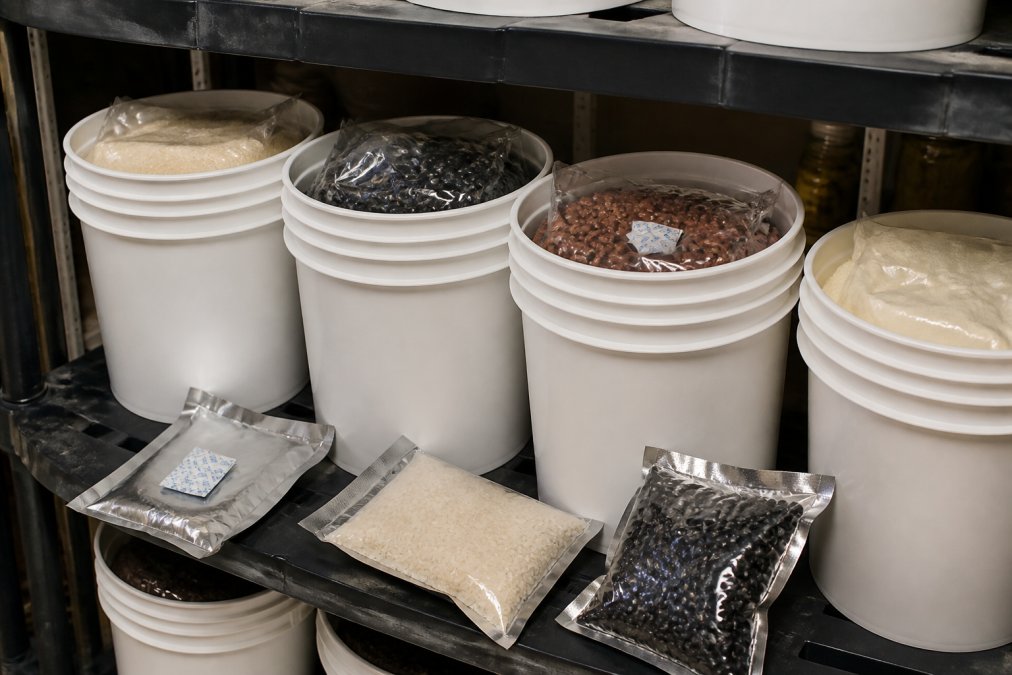
White rice stores 30+ years when sealed properly and provides roughly 1,650 calories per pound. Dried beans cost under a dollar per pound and pack 1,500 calories and 15 grams of protein per pound when cooked. Oats store 20+ years at 75 cents per pound. A single 5-gallon bucket holds approximately 35 pounds of rice for $25-$40, or beans for $20-$30. A family of four needing a three-month supply requires 15-20 buckets total, roughly $400-$700, less than one month of typical grocery spending.
Sealing and protecting your supply
Empty food-grade buckets ($5-$10 each) are only half the solution. Line each bucket with a 6-gallon Mylar bag ($1-$2 when bought in bulk), fill with staples, then add oxygen absorbers (roughly 25 cents each). A 2000cc oxygen absorber removes virtually all oxygen, preventing rancidity, insects, and nutrient loss. Heat-seal the Mylar bag using a hair straightener or cheap heat sealer ($15-$25 one-time cost), then seal the bucket lid tightly.
This three-layer approach, bucket, Mylar, oxygen absorber, preserves rice, beans, and oats for 20-30 years. Without it, expect 5-10 years maximum before quality degrades.
Idea 2: Stock Affordable Canned Goods from Your Grocery Store
Canned goods are the second pillar of cheap emergency food storage. They're already packaged, require no special containers, and rotate naturally through your kitchen. Unlike bulk staples, canned goods integrate directly into your existing grocery routine.
Best non-perishable foods for emergencies on a budget
Focus on items providing complete nutrition with minimal preparation. Canned beans deliver protein and fiber for under 75 cents per can. Canned vegetables cost 50 cents to $1.50 per can and retain most nutrients. Canned tuna, salmon, chicken, and beef cost $1-$3 per can and require only a can opener, delivering 20 grams of protein and 100+ calories per can. Canned soups work as complete meals when combined with vegetables or served straight from the can.
A family spending $25 weekly on canned goods ($100 monthly) accumulates a three-month supply in three months for roughly $300, a rotating supply your family actually eats, with zero waste.
Rotation and storage tips
Use the FIFO method: First In, First Out. Store canned goods separately from your regular pantry. As you purchase new items for normal cooking, move older canned goods from emergency storage into regular use, then replace them with new purchases. This ensures nothing sits untouched for years.
Store in cool, dry places (50-70°F ideally), basements, closets, or under-bed storage work well. Avoid areas above furnaces or water heaters. Keep away from direct sunlight and moisture. Check occasionally for dents, rust, or swelling, which indicate spoilage. Most canned goods maintain quality 3-5 years, though many remain safe 10+ years if stored properly.
Idea 3: Use Mylar Bags and Oxygen Absorbers for Long-Term Preservation
Mylar bags represent the most versatile and space-efficient method for long-term storage. These multi-layer bags block light, moisture, and oxygen, the three enemies of food preservation.
Mylar bags range from pint sizes to 6-gallon sizes suitable for bulk staples. A 100-count box of gallon-sized bags costs $30-$50 (30-50 cents per bag). Oxygen absorbers cost roughly 15-25 cents each in bulk.
The advantage over buckets is flexibility and space efficiency. Store Mylar bags flat on shelves, under beds, in closets, or stacked in corners, ideal for apartments or limited basement space. A gallon-sized Mylar bag holds about 5 pounds of rice or flour in roughly 6x9 inches when sealed, far more compact than a 5-gallon bucket.
Fill the Mylar bag with dry goods, add an appropriate oxygen absorber, then heat-seal using a hair straightener, impulse sealer, or iron. The seal must be tight enough to resist hand pulling. Properly sealed Mylar bags preserve white rice, beans, pasta, and flour for 20-30 years.
Idea 4: Buy Discounted 72-Hour Emergency Kits as a Starting Point
If sourcing buckets, Mylar bags, and oxygen absorbers feels overwhelming, discounted 72-hour emergency kits provide immediate, no-assembly-required supplies. Brands like Saratoga Farms, Augason Farms, and ReadyWise bundle freeze-dried meals into compact containers requiring only boiling water.
A 72-hour kit for one person costs $35-$50; a 4-person kit runs $80-$120. The advantage is simplicity: buy it, store it, and it's ready. The disadvantage is cost-per-calorie and limited duration. A $100 4-person kit provides less food than $100 spent on bulk rice, beans, and canned goods.
Think of 72-hour kits as bridges between doing nothing and building comprehensive supplies. They're grab-and-go backups for evacuation scenarios, car emergency kits, or office supplies. They're also psychologically valuable for people new to preparedness, creating momentum to build larger supplies.
Idea 5: Build a DIY Emergency Food Supply Week by Week
The final approach, ideal for families on tight monthly budgets, is incremental building. Rather than spending $500 at once, commit to adding supplies gradually as part of normal grocery spending.
How to build a cheap emergency food supply incrementally
Set a weekly budget of $10-$20 for emergency food. Each week, buy one bulk item: 10 cans of beans, a 25-pound rice bag, a case of canned vegetables, or a box of pasta. Store separately from your regular pantry. Within three months, you've accumulated substantial supplies without large upfront costs.
This method is psychologically and financially advantageous. You spread costs across months rather than absorbing them at once. You build supplies of foods your family actually eats, ensuring they'll eat familiar foods during emergencies.
Track purchases on a simple spreadsheet: date, item, quantity, cost. After 12 weeks, you'll see what you've stored and identify gaps. This method also accommodates sales naturally, buy extra when canned goods go on sale or bulk stores offer promotions.
Long-Term Food Storage on a Budget: Maximizing Your Investment
Calculating what you actually need
A commonly cited baseline is one pound of food per person per day for short-term emergencies (1-2 weeks). For longer-term preparedness (1-3 months), aim for two pounds per person per day. A family of four needing a three-month supply should target 720-1,080 pounds total.
Roughly 40% should be grains and starches (rice, pasta, oats, flour). Another 30% should be proteins (beans, canned meats, nuts). 20% should be fruits and vegetables (canned or dried). The remaining 10% covers fats, oils, and variety items.
For a family of four and three-month goal:
- Grains: 288-432 pounds (8-12 buckets of rice or equivalent)
- Proteins: 216-324 pounds (mix of beans, canned meats, peanut butter)
- Fruits/vegetables: 144-216 pounds (canned goods, dried items)
- Fats/variety: 72-108 pounds (oils, sugar, spices, salt)
This totals roughly $400-$700 when sourced through bulk channels and canned goods from sales. Spread across a year, it costs $33-$58 monthly.
Storage space and climate considerations
Emergency food storage only works if your location maintains reasonable conditions. Ideal storage is cool (50-70°F), dry, and dark. Basements, climate-controlled closets, and unheated garages in cold climates work well. Attics in hot climates do not, temperature fluctuations degrade food rapidly.
Moisture is your enemy. If storage feels damp or smells musty, invest in a small dehumidifier or moisture-absorbing packets (calcium chloride or silica gel). A 5-gallon bucket of calcium chloride costs $15-$25 and protects large storage areas.
Mylar bags solve space constraints better than buckets, store flat bags under beds, in closets, or stacked in corners. A year's supply for one person fits in roughly 10-15 cubic feet of space in Mylar bags. For a family of four, expect 40-60 cubic feet, roughly a large closet.
Common Mistakes That Waste Money on Emergency Food Storage
Buying food nobody will eat. Test unfamiliar items before committing to bulk purchases. If your family dislikes it, they won't eat it during emergencies either.
Skipping rotation. Implement FIFO from day one. Move older canned goods into regular use and replace them. This prevents waste and ensures freshness.
Storing in wrong locations. A bucket stored in an uninsulated attic won't last five years. Identify cool, dry, dark storage before buying bulk.
Ignoring pest prevention. Sealed Mylar bags and tight-lidded buckets prevent pest entry. Use airtight containers and bay leaves as natural deterrents.
Buying too much of one item. Build variety into your supply. Rotate between different bean types, vegetables, and pasta shapes to reduce decision fatigue.
Neglecting caloric density. Canned vegetables are nutritious but not calorie-dense. Mix calorie-dense staples (rice, beans, pasta, peanut butter, oils) with nutrient-dense variety (canned vegetables, fruits, meats).
Forgetting water storage. Food storage without water is incomplete. You need one gallon per person per day for drinking and cooking. Budget $15-$30 for food-grade water containers and rotate every six months.
Building cheap emergency food storage doesn't require specialized knowledge or large upfront investment. By combining bulk staples in food-grade buckets, rotating canned goods from your grocery store, using Mylar bags for space-efficient storage, starting with a 72-hour kit, and committing to incremental weekly purchases, you create a resilient supply protecting your family without breaking the budget. SHTF Prepper Club provides comprehensive guidance on implementing each strategy with vetted solutions and expert recommendations. Start with whichever approach feels manageable, even small supplies built consistently beat perfect plans never executed. Your family's food security begins with the decision to start.
Frequently Asked Questions
What are the cheapest non-perishable foods for long-term emergency storage?
Bulk dried goods like rice, beans, oats, and flour offer the lowest cost per calorie for long-term storage. Canned vegetables, fruits, and proteins from grocery stores cost $1-$5 per can and require no special preparation. Freeze-dried emergency kits start around $35-$45 for 72-hour supplies. Buying in bulk and storing in food-grade buckets with Mylar bags and oxygen absorbers extends shelf life to 20-30 years while keeping costs minimal. Combine these options to balance cost and variety.
How do I build a cheap emergency food supply without spending a lot upfront?
Start small by adding a few cans each grocery trip, this spreads costs across weeks or months. Buy one food-grade bucket and fill it with bulk rice or beans using Mylar bags and oxygen absorbers. Pick one affordable 72-hour kit to cover the first three days of an emergency. Then rotate: replace canned goods you use with fresh ones, and gradually expand your storage. This approach avoids a large initial purchase while building a functional supply steadily.
What's the difference between short-term and long-term emergency food storage on a budget?
Short-term storage (3-7 days) uses canned goods and affordable freeze-dried kits that cost $35-$100 total. These require a cool, dry place but no special containers. Long-term storage (months to years) uses bulk staples in food-grade buckets sealed with Mylar bags and oxygen absorbers, costing more upfront but stretching your budget further over time. Canned goods last 1-5 years; properly sealed bulk foods last 20-30 years. Combine both for layered preparedness: canned goods for immediate access, bulk storage for extended emergencies.
Do I need special containers for emergency food storage, or can I use what I have at home?
Standard kitchen containers allow moisture and pests to damage food within weeks. Food-grade buckets with snap-on or gamma seal lids cost $5-$10 each and protect food for years. Mylar bags ($0.30-$70 depending on size) add an extra barrier against oxygen and light when sealed with a heat sealer. Oxygen absorbers ($15-$30 per pack) remove air that causes spoilage. Together, these cost under $50 to set up and extend shelf life dramatically compared to regular containers.
How much emergency food should I store, and how do I calculate the right amount?
Start with a 2-week supply for your household as a baseline. Calculate by multiplying family size × 2,000 calories per person per day × 14 days. For a family of four, that's roughly 112,000 calories total. A 72-hour kit provides about 6,000 calories per person; a food-grade bucket of rice stores roughly 25,000 calories. Mix affordable options: budget $200-$400 for a two-week supply using bulk staples and canned goods. Expand gradually based on storage space and budget.
[EXTERNAL_LINK: USDA Food Storage Guidelines | usda.gov]
[EXTERNAL_LINK: Emergency Preparedness Information from FEMA | fema.gov]
[EXTERNAL_LINK: Long-Term Food Storage Best Practices | readyforwhatever.com]
This article was written using GrandRanker